
Miss Tippy Toes!

Miss Tippy Toes

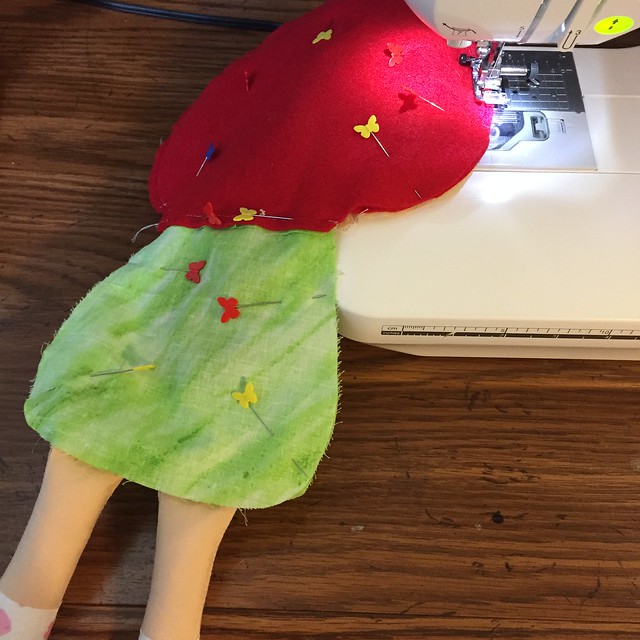
Miss Tippy Toes from Dolls and Daydreams Pattern company is a beautifully designed pattern that demonstrates how to construct a button arm joint so that the arms can move 180 degrees. I started this project back in December, after cutting everything out and embroidering the face
I stopped. 
That is right; this is not a painted face. You can buy the embroidery face design from her shop too! This beautiful face is called the Kawaii Doll Face.  IMG_2234
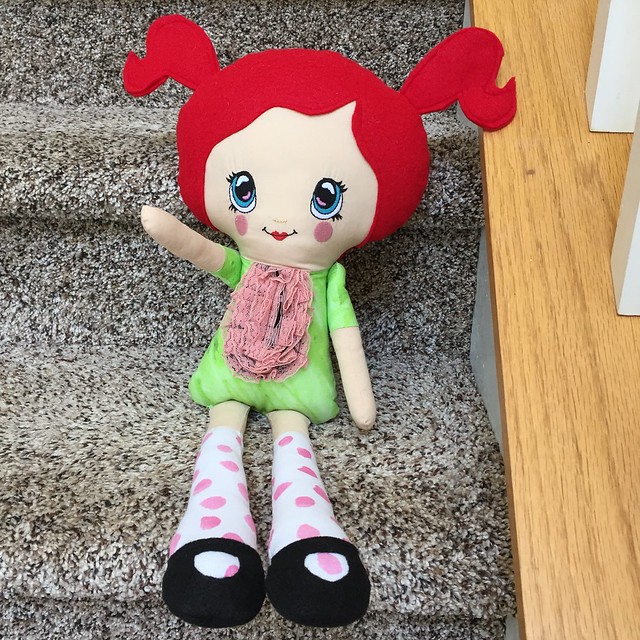
I enjoy making dolls but hand stitching the face can be challenging. Using my embroidery machine to stitch the face was fast and easy. I decided to embroider one piece of fabric and then go back and cut out the face using the template. That way I did not have to worry about the placement of the embroidery design. 

However once I embroidered the face, I was unsure if the project would work. See the stitch count was a little dense and I was worried the doll would have a wrinkly face. So I stopped the project, I didn't even want to try it. I put all of the cutout pieces in a ziplock bag and tucked it into my fabric stash. 
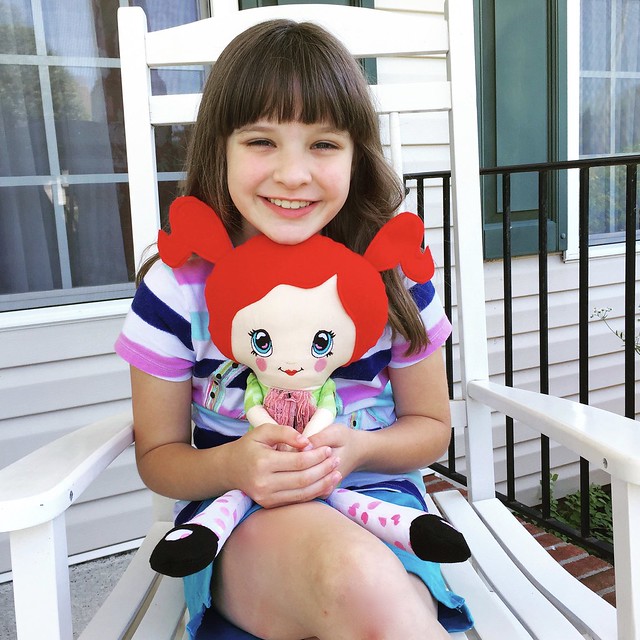
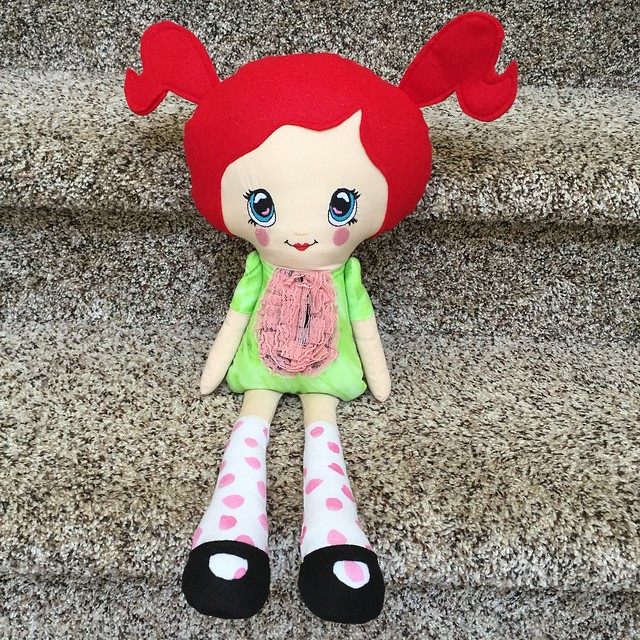
It wasn't until yesterday that I came across the zip lock bag. I took out all of the doll pieces and decided to give it try again.  She was worth it; the project turned out great, and my daughter loves her. 
IMG_2232
I want to try this pattern again with new fabrics! 
IMG_2235
I am so glad that I came across this project. She is super cute, and I know this doll will be loved. Can't wait to sew another doll, so she has a friend to play with.

Comments

Super cute!!! Love her! SO pleased you had fun with my pattern sweetie! Hugs Sarah xxx
James Brown saidā€¦
I really loved reading your thoughts about the sewing machine obviously it's a nice topic and Your site is so easy to use too, Iā€™ve bookmark it in my folder.
http://bestsewingmachinereviewspot.com/
Beststrollers saidā€¦
This comment has been removed by the author.
Henry Leo saidā€¦
Embroidery sewing machines are just love .. have a look at these the best sewing machines at sewingempire.com

Popular posts from this blog

Sweet Coin Purse Tutorial for Teacher Gifts

This time of year is so special to me because I get to show my gratitude for all of the hard work that goes into teaching my daughters. I love to make handmade gifts and this year is no exception. Since money does not grow on trees around here, I looked at my stash (I keep my scraps in hat boxes ) and tried to see what I had a lot of; small zippers, trims, Peltex strips ( from making iPad cases ), fabric scraps and some hardware for key fobs. So I set to work.  Materials: Plastic multipurpose 5" Zipper  Fabric Scraps Lightweight interfacing 808 Pellon Trims (We clipped  key fobs  with 1.5" swivel hooks onto our coin purses . There are tons of tutorials on making key fobs .) Step 1: Print out the Coin Purse Template  PDF.  Cut 2 main fabric, cut 2 lining and 2 interfacing using the template.  Optional: Cut a 2"X2" square of your choice main fabric or lining. This strip of fabric is used to clip a key fob to your coin purse later....

Fun in the Sun Mermaid Tutorial

Sewing Materials: 1/4 yard of Lycra or  5T or larger old swimsuit Thread Stretch Needle (helps) Sewing Machine and Sewing Notions Print the PDF patterns pieces out and tape them together. āœ„āœ„āœ„āœ„āœ„āœ„āœ„āœ„āœ„āœ„āœ„ āœ„āœ„āœ„āœ„ āœ„āœ„ Step 1: Cutting Layout-  Place the templates over the fabric and cut. āœ„āœ„āœ„āœ„āœ„āœ„āœ„āœ„āœ„āœ„āœ„ āœ„āœ„āœ„āœ„ āœ„āœ„ Step 2:   Fold the top edges of the mermaid tail and sew across. āœ„āœ„āœ„āœ„āœ„āœ„āœ„āœ„āœ„āœ„āœ„ āœ„āœ„āœ„āœ„ āœ„āœ„ Step 3: Place the mermaid tale pieces right sides together. Sew around the mermaid tail using the stretch stitch, it looks like a bolt of lighting. āœ„āœ„āœ„āœ„āœ„āœ„āœ„āœ„āœ„āœ„āœ„ āœ„āœ„āœ„āœ„ āœ„āœ„ Step 4: Flip the mermaid tail right side out using a chopstick.   Option: You can add Poly-fil to make the end of the tale puffy.   Set aside. āœ„āœ„āœ„āœ„āœ„āœ„āœ„āœ„āœ„āœ„āœ„ āœ„āœ„āœ„āœ„ āœ„āœ„ Bodice   Step 1: Cut a bodice measuring  4.5ā€ X1.5ā€ or use template. āœ„āœ„āœ„āœ„āœ„āœ„āœ„āœ„āœ„āœ„āœ„ āœ„āœ„āœ„āœ„ āœ„āœ„ Step 2: Fold the bodice right sides together and sew the  short ends making a loop. Use the e...

Cute as a Button Bookmark Tutorial

These are called Cute as a Button Bookmakers. They are cheap, easy to make and are wonderful gifts!  All you need is  Bookmarkers/ PaperClips Size 45 or 1 1/8" Button Covers and kit Glue Gun Pliers (which you won't need if you get the flat back buttons). Step 1: Make a few fabric covered buttons.  These are size 45 or 1 1/8" buttons. Step 2: If you use normal buttons you will need to take the loops off to make them flat. However you can buy flat back buttons and not have to worry about the loop. Step 3: Add a dab of hot glue to the top of the large paperclip pad and place your fabric button on top of the glue. Step 4: Let it cool and it's ready to use! Happy Crafting!