
Two Zipper Hipster Review

fullsizeoutput_19cafullsizeoutput_19c6
This pattern is called the Two Zipper Hipster, by Dog Under My Desk. I first reviewed it four years ago here after receiving my embroidery machine for Christmas 2014.
Untitled
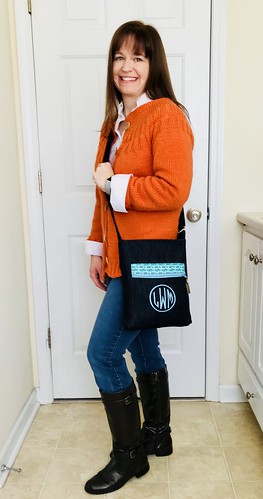
I love this design and I have to say I believe this crossover bag to be the best crossover bag pattern out there. The slip pocket and zipper front pocket is super convenient. I use it for my phone and glasses. The adjustable strap makes this bag perfect for anyone.
Untitled
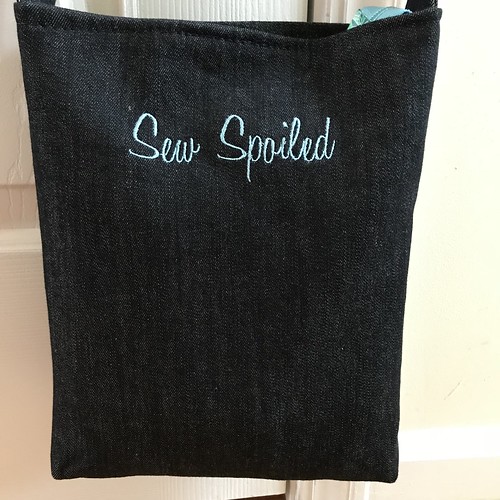
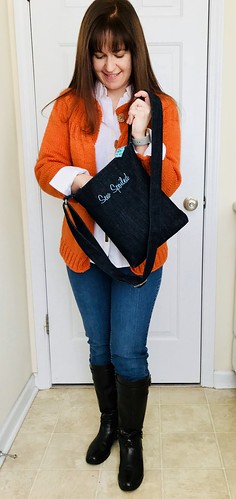
I personalized the front of the zipper pocket with my initials and added a Sew Spoiled design on the back. Selfish sewing is so much fun!

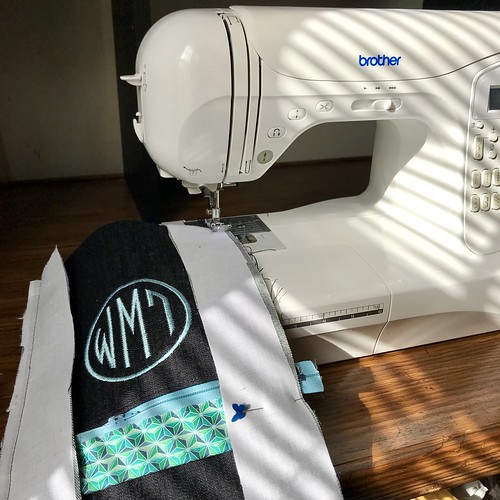
I realized when I got home from the fabric store that I bought the wrong color in zippers. I bought navy and the denim was not navy and not dark enough to be black. Well, with black zippers it looked navy and with navy zippers, it looked black. So I decided to go with light blue and match the embroidery to tie it all together. This also made me realize that you could do this with a variety of colors; making the embroidery and the zipper color match.
Untitled
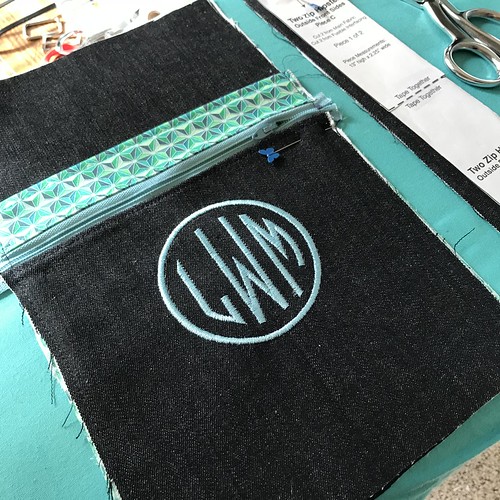
I also changed the top of the slip pocket zipper panel to accent the blue zipper color, this fabric is also the lining fabric. I couldn't be happier with the entire project!

Comments

toto365.pro saidā€¦
ķ† ķ† ģ‚¬ģ“ķŠø
ķ† ķ† 365ķ”„ė”œ
ķ”„ė”œķ† 


Great goods from you, man. I have understand your stuff previous to and you are just extremely fantastic. I really like what youā€™ve acquired here, really like what you are saying and the way in which you say it. You make it enjoyable and you still care for to keep it smart. I cant wait to read far more from you. This is really a great site.
toto365.pro saidā€¦
ģŠ¤ķ¬ģø ģ¤‘ź³„
ķ† ķ† ģ‚¬ģ“ķŠø
ķ† ķ†  ėŒ€ķ‘œ ģ‚¬ģ“ķŠø


After going over a number of the blog posts on your website, I truly appreciate your way
of writing a blog. I saved it to my bookmark website list and will be checking back in the
near future. Please check out my web site as well and let me know how you feel.
toto365.pro saidā€¦
ģŠ¤ķ¬ģø ķ† ķ† 
ė°°ķŠøė§Øķ† ķ† ķ”„ė”œ
ė°°ķŠøė§Øķ† ķ† 


Hello There. I found your blog using msn. This is a very well written article.
Iā€™ll be sure to bookmark it and return to read more of your useful information. Thanks for the post.

Popular posts from this blog

Sweet Coin Purse Tutorial for Teacher Gifts

This time of year is so special to me because I get to show my gratitude for all of the hard work that goes into teaching my daughters. I love to make handmade gifts and this year is no exception. Since money does not grow on trees around here, I looked at my stash (I keep my scraps in hat boxes ) and tried to see what I had a lot of; small zippers, trims, Peltex strips ( from making iPad cases ), fabric scraps and some hardware for key fobs. So I set to work.  Materials: Plastic multipurpose 5" Zipper  Fabric Scraps Lightweight interfacing 808 Pellon Trims (We clipped  key fobs  with 1.5" swivel hooks onto our coin purses . There are tons of tutorials on making key fobs .) Step 1: Print out the Coin Purse Template  PDF.  Cut 2 main fabric, cut 2 lining and 2 interfacing using the template.  Optional: Cut a 2"X2" square of your choice main fabric or lining. This strip of fabric is used to clip a key fob to your coin purse later....

Fun in the Sun Mermaid Tutorial

Sewing Materials: 1/4 yard of Lycra or  5T or larger old swimsuit Thread Stretch Needle (helps) Sewing Machine and Sewing Notions Print the PDF patterns pieces out and tape them together. āœ„āœ„āœ„āœ„āœ„āœ„āœ„āœ„āœ„āœ„āœ„ āœ„āœ„āœ„āœ„ āœ„āœ„ Step 1: Cutting Layout-  Place the templates over the fabric and cut. āœ„āœ„āœ„āœ„āœ„āœ„āœ„āœ„āœ„āœ„āœ„ āœ„āœ„āœ„āœ„ āœ„āœ„ Step 2:   Fold the top edges of the mermaid tail and sew across. āœ„āœ„āœ„āœ„āœ„āœ„āœ„āœ„āœ„āœ„āœ„ āœ„āœ„āœ„āœ„ āœ„āœ„ Step 3: Place the mermaid tale pieces right sides together. Sew around the mermaid tail using the stretch stitch, it looks like a bolt of lighting. āœ„āœ„āœ„āœ„āœ„āœ„āœ„āœ„āœ„āœ„āœ„ āœ„āœ„āœ„āœ„ āœ„āœ„ Step 4: Flip the mermaid tail right side out using a chopstick.   Option: You can add Poly-fil to make the end of the tale puffy.   Set aside. āœ„āœ„āœ„āœ„āœ„āœ„āœ„āœ„āœ„āœ„āœ„ āœ„āœ„āœ„āœ„ āœ„āœ„ Bodice   Step 1: Cut a bodice measuring  4.5ā€ X1.5ā€ or use template. āœ„āœ„āœ„āœ„āœ„āœ„āœ„āœ„āœ„āœ„āœ„ āœ„āœ„āœ„āœ„ āœ„āœ„ Step 2: Fold the bodice right sides together and sew the  short ends making a loop. Use the e...

Cute as a Button Bookmark Tutorial

These are called Cute as a Button Bookmakers. They are cheap, easy to make and are wonderful gifts!  All you need is  Bookmarkers/ PaperClips Size 45 or 1 1/8" Button Covers and kit Glue Gun Pliers (which you won't need if you get the flat back buttons). Step 1: Make a few fabric covered buttons.  These are size 45 or 1 1/8" buttons. Step 2: If you use normal buttons you will need to take the loops off to make them flat. However you can buy flat back buttons and not have to worry about the loop. Step 3: Add a dab of hot glue to the top of the large paperclip pad and place your fabric button on top of the glue. Step 4: Let it cool and it's ready to use! Happy Crafting!