This summer McCall's and PatternReview are sponsoring a sewing contest just for kids called #KidsCanLearn2Sew. In order to enter to win patterns, fabric, and a new Janome sewing machine you have to submit a 1-minute video of your child learning to sew. This video project was so much fun and gave us a goal to work on while the girls were on summer vacation.
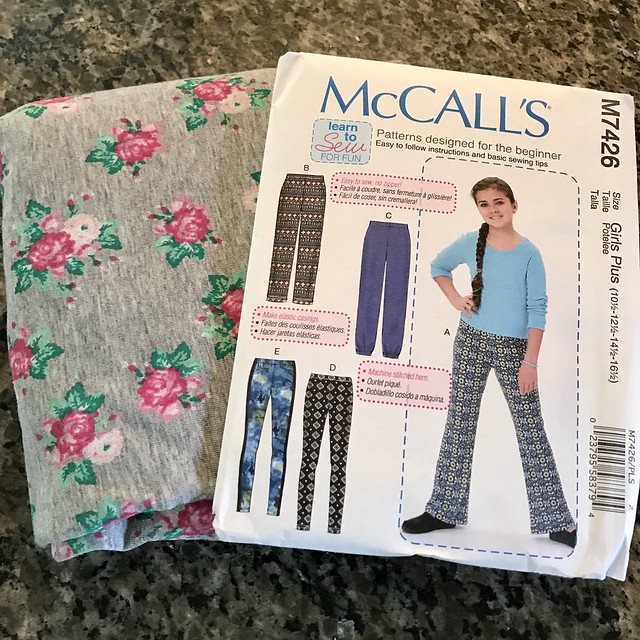
There were a lot of stages of the project like picking out the fabric and pattern, it took my daughter forever to look around at JoAnn's. Luckily, we knew what pattern she wanted, M7426, because we had shopped online but when it came to the fabric she surveyed every knit fabric choice three times at least.
I was shocked when Kinsey showed me her choices. Inside my mind, I was screaming, "Leggings?? You want to sew knit leggings? Are you sure you don't want to sew a cotton shirt or dress?" but I kept my cool and acted like it was totally fine.
Which... guess what...it was fine.
My older daughter even got into helping her younger sister by videoing her on the iPad. It was great seeing them work together for one goal.
Here is her finished product. I loved that we have this video of her discovering sewing and exploring how to put a sewing pattern together.
We also put together an out take video of her trying to complete the leggings project. We laughed so hard when we made a mistake. Talk about learning how to get over your mistakes, sewing forces you to try and try again if you first don't succeed. The seam ripper is your best friend and you have to rise above to get the best end result.
Here is our Out Takes Video....
I love this video! My favorite out take is when she tears the paper pattern. She is so funny! I hope she wins but we have won just by playing the game. Thank you, McCall's and PatternReview for the amazing opportunity to participate. We will remember this forever!
Comments