
Noodlehead, Super Tote

Untitled
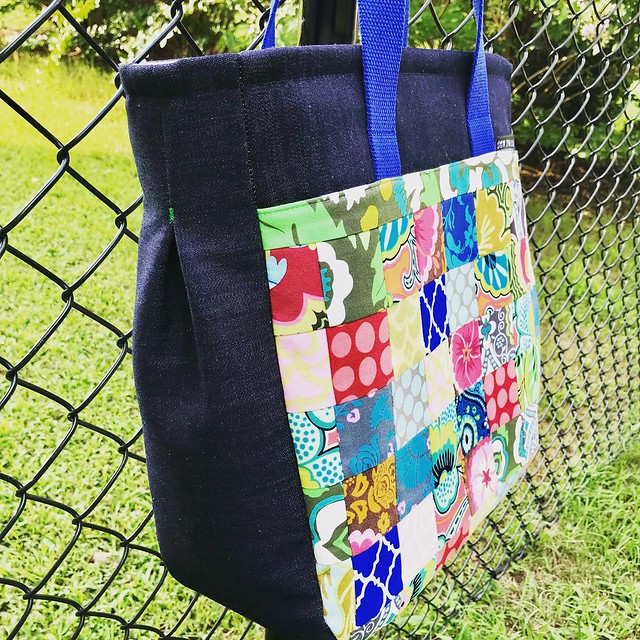
My favorite sewing projects are always bags! One size fits all and each one is fun to create. At the end of the summer, I started searching for a teacher tote to take to school. I needed a tote to carry my grade book, notebook and calendar stuff. I found Noodlehead's Supertote, perfect for any teacher!
Untitled
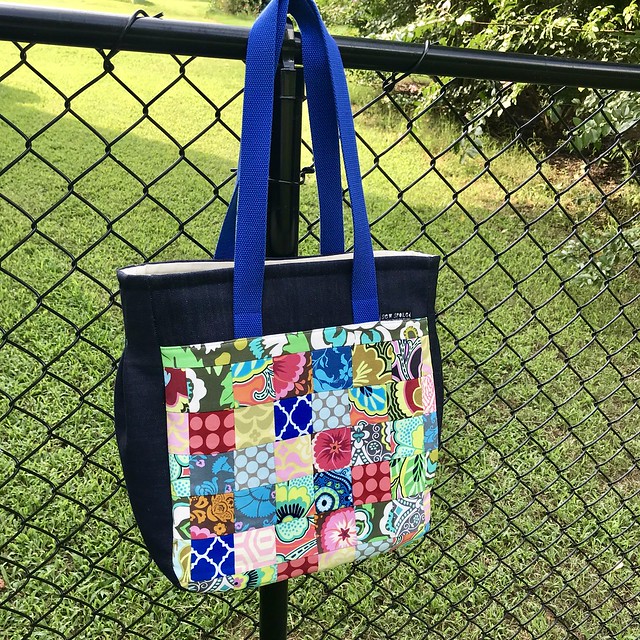
I did not have enough fabric to make it when I looked through my stash, so I found all of my favorite scraps and started to piece them together. Most of them are out-of-print fabrics from Amy Butler collections. I also took a shortcut and used canvas webbing for my straps. Last but not less, the bottom of the tote was not sturdy enough so I added plastic to the base.
Untitled
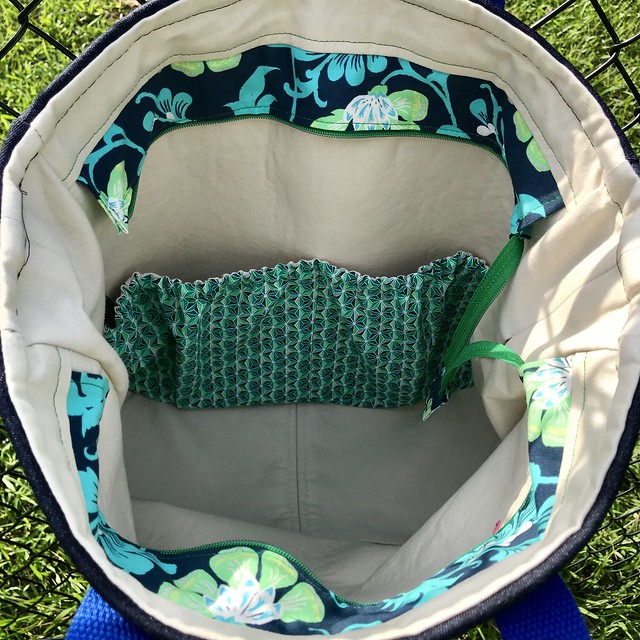
The Super Tote design is the perfect size for a teacher tote. I can store two 1.5" notebooks inside. There is also a slip pocket on the outside perfect for my badge and pens and an interior elastic slip pocket for post-its and other office supplies. I love that the top has a zipper closure, however, I have not used it since I am carrying notebooks around. I highly recommend making the Super Tote. This pattern is written well and is easy to understand.
Best wishes and tons of stitches!

Comments

Lisa Resnick saidā€¦
I'm personally a big fan of I'm personally a big fan of blog. Thanks for sharing this post.
clipping path blog. Thanks for sharing this post.
clipping path

Popular posts from this blog

Sweet Coin Purse Tutorial for Teacher Gifts

This time of year is so special to me because I get to show my gratitude for all of the hard work that goes into teaching my daughters. I love to make handmade gifts and this year is no exception. Since money does not grow on trees around here, I looked at my stash (I keep my scraps in hat boxes ) and tried to see what I had a lot of; small zippers, trims, Peltex strips ( from making iPad cases ), fabric scraps and some hardware for key fobs. So I set to work.  Materials: Plastic multipurpose 5" Zipper  Fabric Scraps Lightweight interfacing 808 Pellon Trims (We clipped  key fobs  with 1.5" swivel hooks onto our coin purses . There are tons of tutorials on making key fobs .) Step 1: Print out the Coin Purse Template  PDF.  Cut 2 main fabric, cut 2 lining and 2 interfacing using the template.  Optional: Cut a 2"X2" square of your choice main fabric or lining. This strip of fabric is used to clip a key fob to your coin purse later....

Fun in the Sun Mermaid Tutorial

Sewing Materials: 1/4 yard of Lycra or  5T or larger old swimsuit Thread Stretch Needle (helps) Sewing Machine and Sewing Notions Print the PDF patterns pieces out and tape them together. āœ„āœ„āœ„āœ„āœ„āœ„āœ„āœ„āœ„āœ„āœ„ āœ„āœ„āœ„āœ„ āœ„āœ„ Step 1: Cutting Layout-  Place the templates over the fabric and cut. āœ„āœ„āœ„āœ„āœ„āœ„āœ„āœ„āœ„āœ„āœ„ āœ„āœ„āœ„āœ„ āœ„āœ„ Step 2:   Fold the top edges of the mermaid tail and sew across. āœ„āœ„āœ„āœ„āœ„āœ„āœ„āœ„āœ„āœ„āœ„ āœ„āœ„āœ„āœ„ āœ„āœ„ Step 3: Place the mermaid tale pieces right sides together. Sew around the mermaid tail using the stretch stitch, it looks like a bolt of lighting. āœ„āœ„āœ„āœ„āœ„āœ„āœ„āœ„āœ„āœ„āœ„ āœ„āœ„āœ„āœ„ āœ„āœ„ Step 4: Flip the mermaid tail right side out using a chopstick.   Option: You can add Poly-fil to make the end of the tale puffy.   Set aside. āœ„āœ„āœ„āœ„āœ„āœ„āœ„āœ„āœ„āœ„āœ„ āœ„āœ„āœ„āœ„ āœ„āœ„ Bodice   Step 1: Cut a bodice measuring  4.5ā€ X1.5ā€ or use template. āœ„āœ„āœ„āœ„āœ„āœ„āœ„āœ„āœ„āœ„āœ„ āœ„āœ„āœ„āœ„ āœ„āœ„ Step 2: Fold the bodice right sides together and sew the  short ends making a loop. Use the e...

Cute as a Button Bookmark Tutorial

These are called Cute as a Button Bookmakers. They are cheap, easy to make and are wonderful gifts!  All you need is  Bookmarkers/ PaperClips Size 45 or 1 1/8" Button Covers and kit Glue Gun Pliers (which you won't need if you get the flat back buttons). Step 1: Make a few fabric covered buttons.  These are size 45 or 1 1/8" buttons. Step 2: If you use normal buttons you will need to take the loops off to make them flat. However you can buy flat back buttons and not have to worry about the loop. Step 3: Add a dab of hot glue to the top of the large paperclip pad and place your fabric button on top of the glue. Step 4: Let it cool and it's ready to use! Happy Crafting!