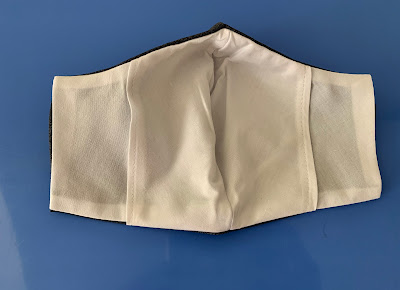
The perfect fit mask for your friends and family.
This mask tutorial has a pocket for a filter and is 3 layers of fabric. This is not a surgical face mask.
Materials Needed:
Main Fabric: Scrap Fabric
Lining Fabric: Scrap Fabric
3/8” Elastic
4 Pony Beads
Large Tapestry Needle
Step One: Cut
Cut out two Template A in the main fabric.
Cut out two Template B in lining fabric.
Cut out two Template C (Pocket) in lining fabric.
Cut 2 pieces of Elastic at the measurement below according to the mask size.
|
Size |
Elastic To cut in inches |
|
Adult Large |
11 |
|
Adult Medium |
10 |
|
Adult Small |
9 |
|
Child Large |
8 |
|
Child Medium |
7 |
|
Child Small |
6 |
Step Two:
Sew the Template A (two main fabric) pieces, placed right sides together, and sew along the curve. Sew the Template B (lining fabric) pieces, placed right sides together, and sew along the curve. Sew the Template C (pocket) pieces, placed right sides together, and sew along the curve.
Step Three: How to create a pocket.
Take the Template C (pocket) and iron the side edges of the pocket template over .25” twice. Then topstitch the edges. Zigzag stitch over the curved stitch in the center.
Or serge the side edges of the pocket. Then fold and iron the serged edges and topstitch the edge. Serge over the curved stitch in the center.
Step Four: Sewing the mask templates altogether.
Layer the mask fabric pieces in this order. Place Template B right side up, then Template C right side up, and finally Template A wrong side up. Match the center seams first, then pin center to the sides of the mask.
Step Five: Sew the top and bottom of the mask.
Sew .25” from the top curve of the mask and the straight edge along the bottom of the mask. Clip the curve with pinking sheers. If you do not have pinking sheers small cuts along the curved edges would help. Make sure you do not cut the stitching.
Step Six: Flip!
Take all the pins out and flip the mask right side out using one of the raw, side edges. Make sure Template C (the pocket) is in front of Template B (lining). Press the mask flat, then fold the raw edges .5” inside and finally iron the side edges. Fold the mask in half to make sure the mask is symmetrical.
Step Seven: Adjustable ear-straps!
Take the tapestry needle and thread one elastic piece through two pony beads.
Then separate the pony beads and thread the elastic back through the bead that is furthest from the threaded needle.
Pull the elastic so the strap is symmetrical.
Step 8: Pin and topstitch!
Pin one of the ear straps to the side edge of the mask. Placing the elastic and the top and bottom corners of the mask. Repeat on the opposite side. Topstitch the side edges twice.
Finally, topstitch the top curve and bottom edge of the face mask to complete your project!


Comments
섯다
고스톱
토토사이트
스포츠토토
한국야동
일본야동
토토사이트
토토사이트
바카라게임사이트
바카라
After going over a few of the blog posts on your web page,
I honestly like your way of writing a blog. I book-marked it to my bookmark webpage list and will be checking back soon. Take a look at my
web site too and let me know how you feel.
스포츠토토
토토사이트
먹튀검증
Its like you read my mind! You seem to know a lot about this, like you wrote the book in it or something. I think that you can do with a few pics to drive the message home a bit, but instead of that, this is excellent blog. A great read. I’ll definitely be back.
토토
토토사이트
I’m not sure why but I think its a linking issue. I’ve tried it in two different web browsers and both show the same results. Check other way to work it out.. Thanks!