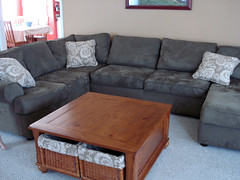
I have started sewing for my house!! Finally I have made some time for it. This is my latest creation. I got the fabric for the pillows and the fabric covered baskets from my Fabric Fairy! My Aunt bought the fabric as a slip cover for her couch, on sale of course. She said that it did not work, so she gave it to me:) It is Weaverly heavy weight fabric!! I cut the piping that the slip cover had out so I could reuse it on the pillows. Then I used Creative Little Daisy's tutorial on piping pillows. Autum's tutorials are always filled with wonderful pictures and easy instructions. Finally, I covered the baskets.
Baskets Tutorial :)
I measured the height of the baskets and added 1.5" for hem and seam allowance. Then measured the width, outside of the basket around the top and added 1" for seam allowance. I cut this rectangle out and laid is aside. For the bottom of the basket I measured the length the width and added 1" to both sides for seam allowance.
I hemmed the longest side of the first piece (fold .5", press with iron, fold .5", press, then topstitch .25"). Then I made a tube joining the shorter ends, right sides together. I pinned the bottom piece to the tube right sides together and sewed around the bottom of the cover. You have to pivot your needle at each 90 degree turn.
To make a snug fit. Zigzag stitch a short piece of elastic to each corner on the wrong side of the fabric. Pull the elastic as you stitch so it gathers.
This was so easy, I just wanted to share!!
Comments