
Smart Tips!

One of the problems I face going into the fabric store is looking at each fabric as a new project to make. I tend to loose focus on the soul purpose of me being there (get elastic) and I come out of the store with a brand new project instead of the elastic I needed in the first place. Do you have this problem too?? 
Here are some helpful Smart Tips...
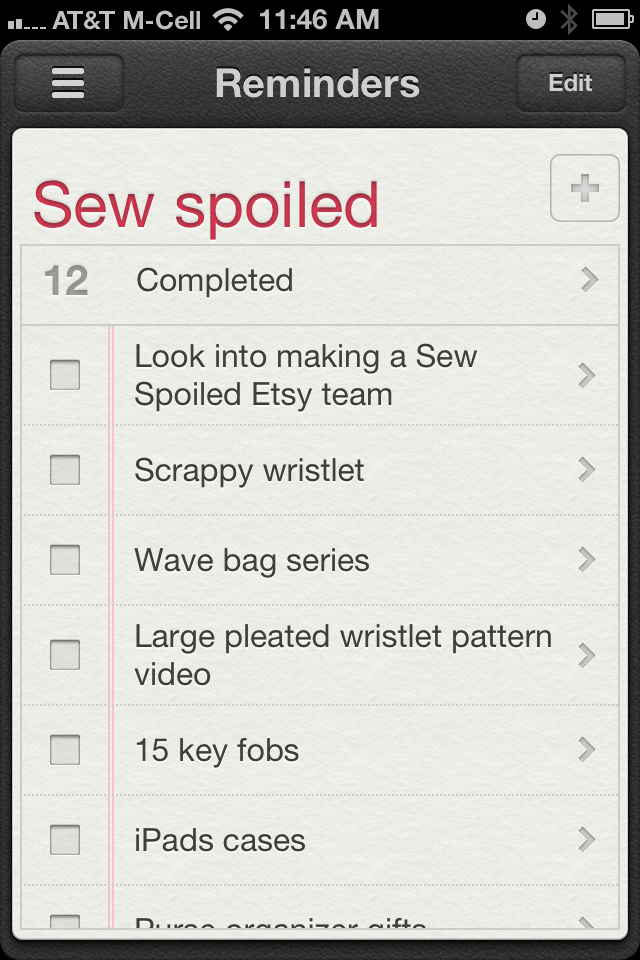
Use your smart phone as a list taker for your materials, notions, etc. that you need. 

This app is Notes from one of the built-in apps from Apple.
See a new project on Pinterest? Copy and paste the materials list to Sewing Shopping list for the store.
------------------------------------------------------------------------
I am a List Taker Queen I so when I discovered the Reminders app, another built-in app on the iPhone. I instantly loved it.
You can set it to tell you when and where your projects are suppose to be done. This is a life saver around the holiday season. Especially when I am trying to make handmade goodness for everyone. When you complete a task, check it off your list. If you want to admire what you have completed you can click completed at the top.
Another great tip is to use your Smart phone for inspiration photos. If you do see a project you want to create snap a quick photo of it so you won't forget it. Inspiration can happen anywhere!


Comments

Sweet Woodruff said…
Smart and clever. Thanks for 'spoiling' us. I too can't focus in a fabric store. I get too excited.
Corrine said…
Dear Leah, you always have great ideas. I am a lister as well, couldn't get along without them. I was thinking about you late last night when pinning a quilt. I use the nine-patch pin cushion that I won in one of your give away's to store my quilting pins. I will have to take a picture and email it to you. I have so many pins in it you probably will not recognize it!

Popular posts from this blog

Sweet Coin Purse Tutorial for Teacher Gifts

This time of year is so special to me because I get to show my gratitude for all of the hard work that goes into teaching my daughters. I love to make handmade gifts and this year is no exception. Since money does not grow on trees around here, I looked at my stash (I keep my scraps in hat boxes ) and tried to see what I had a lot of; small zippers, trims, Peltex strips ( from making iPad cases ), fabric scraps and some hardware for key fobs. So I set to work.  Materials: Plastic multipurpose 5" Zipper  Fabric Scraps Lightweight interfacing 808 Pellon Trims (We clipped  key fobs  with 1.5" swivel hooks onto our coin purses . There are tons of tutorials on making key fobs .) Step 1: Print out the Coin Purse Template  PDF.  Cut 2 main fabric, cut 2 lining and 2 interfacing using the template.  Optional: Cut a 2"X2" square of your choice main fabric or lining. This strip of fabric is used to clip a key fob to your coin purse later....

Veruca Salt Dress

Every year we perform a musical and one of the highlights for me as a theater mom and seamstress is I get to make costumes! I love sewing and when I can sew for a show or for a music reason it is awesome! This year was Willy Wonka and the Chocolate Factory and I was able to recreate Veruca's red dress. The first step is to find a sewing pattern that I can manipulate to look like what the character needs.  I wanted to make the dress out of Pont de Roma fabric so it moved with the actress. Then I remembered the  Marianne Dress by Christine Haynes , it is perfect because it also had a peter pan collar. The peter pan collar did have some issues. I did not want a t-shirt binding. Also, the back of the collar did not have a collar. I drafted a back collar piece and since the opening was not stretchy, I created a keyhole with a button and loop closure. I lengthened the sleeves and used the cuffs from the pattern for long sleeves. Next, we added the buttons! We al...

Fun in the Sun Mermaid Tutorial

Sewing Materials: 1/4 yard of Lycra or  5T or larger old swimsuit Thread Stretch Needle (helps) Sewing Machine and Sewing Notions Print the PDF patterns pieces out and tape them together. ✄✄✄✄✄✄✄✄✄✄✄ ✄✄✄✄ ✄✄ Step 1: Cutting Layout-  Place the templates over the fabric and cut. ✄✄✄✄✄✄✄✄✄✄✄ ✄✄✄✄ ✄✄ Step 2:   Fold the top edges of the mermaid tail and sew across. ✄✄✄✄✄✄✄✄✄✄✄ ✄✄✄✄ ✄✄ Step 3: Place the mermaid tale pieces right sides together. Sew around the mermaid tail using the stretch stitch, it looks like a bolt of lighting. ✄✄✄✄✄✄✄✄✄✄✄ ✄✄✄✄ ✄✄ Step 4: Flip the mermaid tail right side out using a chopstick.   Option: You can add Poly-fil to make the end of the tale puffy.   Set aside. ✄✄✄✄✄✄✄✄✄✄✄ ✄✄✄✄ ✄✄ Bodice   Step 1: Cut a bodice measuring  4.5” X1.5” or use template. ✄✄✄✄✄✄✄✄✄✄✄ ✄✄✄✄ ✄✄ Step 2: Fold the bodice right sides together and sew the  short ends making a loop. Use the e...