Don't forget to add your wonderful pictures to the Flickr: Sew Spoiled Cabrio Tote Sew Along. Not only is it fun to see what everyone is making but now you could also win a fun prize.
Five Sew Spoiled epatterns will be awarded March 8, 2011 to the winner in each of these catagories...
1. Most Inspiring,
2. Craziest Camera Angle,
3. Loveliest Light,
4. Bag Making Magic, and
5. "Oops, I meant to do That?".
Continue to cut, sew and have a little fun behind the camera or in front. It is totally up to you. Just make sure you submit your photos here. Can't wait to see your pictures!
I am hoping that some pictures and inspiration will get us excited about this weeks steps to complete for our new Cabrio Totes. We will start sewing the straps and outer shell panels this week.
Here is the rest of our schedule...
Straps and Outer Shell Panel gathered (Step 3-6) -- - Feb. 9- Feb. 15
Finish outer shell and make pockets (Step 7-8) - - - - - Feb. 16- Feb. 22
Magnet Clasp and Finish Lining (Step 9-11) - - - - - - Feb. 23- March 1
Finish the Tote (Step 12-14)- - - - - - - - March 2- 8
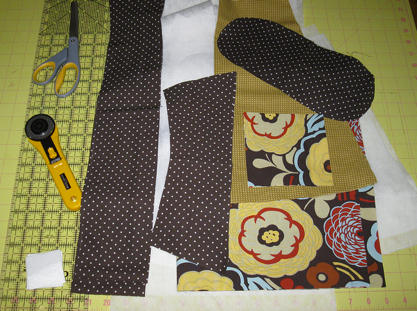
My cutting picture for the sew along:). These fabrics are from Amy Butler’s new collection called Soul Blossom.
There is brown in each print, so I think it will look great with the leather accents.
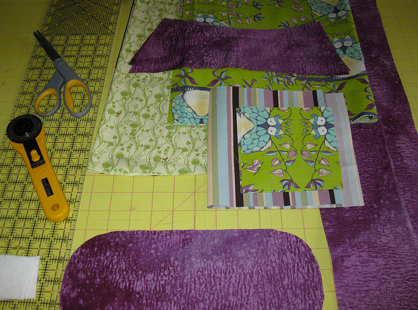
These two pictures are from so simply Stephanie she is creating two bags in the sew along. One is for her and one is for a friend.
She has caught “the sewing bug” and has been sewing everything in site! Thanks for posting such wonderful pictures and leading the group with creativity!
I hope everyone adds more pictures. You could even win a free pattern!
Good Luck everyone!
Comments