I received this email today. I wanted to share this information with you because it might help you create a sturdier bag.
✄✄✄✄✄✄✄✄✄✄✄✄✄✄✄✄✄✄✄✄✄✄✄✄✄✄✄✄✄✄✄✄✄✄✄✄✄✄
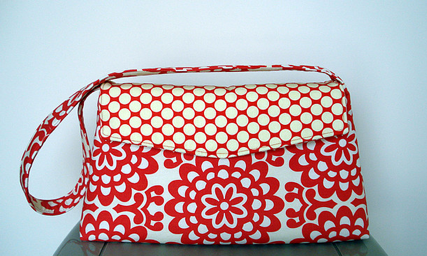
“Hello Leah,I’m new to the world of sewing, and my first project was your Versatile Bag. Bought the pattern a couple of weeks ago and got busy. I LOVE the purse. Such a great design. And the pattern and instructions were so easy to follow, so thank you for that.
The problem then, should be obvious when you look at the photos. I followed your instructions to a T, specifically in regard to interfacing. Can’t recall off the top of my head, but I’m pretty sure you’d specified heavy weight craft fusible Pellon interfacing. Regardless, whatever it was, that’s what I bought.
Anyway, I don’t get what went wrong. When I look at the photos of your bags, they look so stable and firm. Just between us, do you use your own instructions or do you pump your bags up with extra reinforcing? Not trying to be insulting (not at all, please… I hope that didn’t come across that way…), I’ll just do whatever I have to to produce those results. I took my bag out this morning and by the time I got to the coffee shop I saw that I was now wearing a collapsing mess on my shoulder. And there was nothing in it of much weight to have caused the cave in. Just a wallet, keys and some make-up.
I’ve done a lot of web surfing re purse interfacing over the past week, and I’m not coming up with anything profound. Can you share some of your wisdom with me?
Best,
Jennifer”
✄✄✄✄✄✄✄✄✄✄✄✄✄✄✄✄✄✄✄✄✄✄✄✄✄✄✄✄✄✄✄✄✄✄✄✄✄✄
Here is my reply:
Your bag is beautiful! I do have a few tips. Interfacing is what we all use to help our favorite cotton fabrics stand up to the task of becoming bags. This Interfacing Guide from Amy Butler « Sew,Mama,Sew! Blog can help explain the different interfacings available and the application. I have found a common rule is the smaller the bag the thinner the interfacing, the larger the bag the thicker the interfacing. I like to also use fusible fleece. It is honestly my favorite interfacing for middle to large size bags. Since you have finished this bag I would use one of my favorite Sew Spoiled tips!

** Cut out two side pieces and one base piece of plastic canvas (used for cross stitching) the shape of your versatile bag. Roll it up and insert it through the lining opening. After sewing the lining closed, tack the plastic canvas by using a few stitches through the lining.**
Do you have any more suggestions for my friend Jennifer?? Share what you know about interfacing and making your bags sturdier!
Pulling all of our “know how” together will make us better bag makers! If you have any bag making questions please email me at leah.sewspoiled@gmail.com. I love reading and seeing your completed Sew Spoiled projects. You can also add your Sew Spoiled project pictures here at, Flickr: your Sew Spoiled projects!. Thank you for sharing what you know, questions and your pictures!
Comments
I think I will try the cross stich stuff on an upcoming project!