
Eggs and Bacon!

My husband came home talking about getting eggs and bacon at work. What? When I heard all of the ingredients I knew I had to give it a try. This fun recipe is great to make with kids.

It is fast and simple, my kind of cooking!
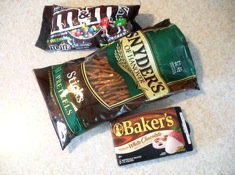
Step1-2010-09-1-12-56.jpg

Ingredients:

Pretzels (one bag)

White Chocolate Chips or bakers chocolate

M&Ms (one large bag)

wax paper

Step 1: Spread the pretzels out 2 by 2 on a sheet of wax paper ( I am not using wax paper, we were out, but cling wrap works too).

Step 2: Heat the white chocolate until smooth and creamy! You can do this in the microwave but I recommend heating it on the stove with a boiling pot of water and a glass bowl for the white chocolate on top, add a splash of milk to make it creamy.

Step 3: Pour a tablespoon of white chocolate over each pair of pretzels. After making these a second time, I realized that if you place the white chocolate in a ziplock bag and cut one point off to pipe it on, you have more control.

step2-2010-09-1-12-56.jpg

Step 4: Place an M&M on top of the white chocolate.

step3-2010-09-1-12-56.jpg

Let them cool or if you canā€™t wait, put them into the refrigerator to harden.

Eat your eggs and bacon watching your favorite movie!

We love these!

6429E12C38E1D1A63D84EB0D937554A4-2010-09-1-12-56.png

Comments

Marie saidā€¦
yum! I want some of that right now!
Emily saidā€¦
Oh I've done that with pretzel twists, hershey kisses and m&ms. Fun treat at Christmas with the red and green m&ms. Love the idea of eggs and bacon! Too cute!

Popular posts from this blog

Sweet Coin Purse Tutorial for Teacher Gifts

This time of year is so special to me because I get to show my gratitude for all of the hard work that goes into teaching my daughters. I love to make handmade gifts and this year is no exception. Since money does not grow on trees around here, I looked at my stash (I keep my scraps in hat boxes ) and tried to see what I had a lot of; small zippers, trims, Peltex strips ( from making iPad cases ), fabric scraps and some hardware for key fobs. So I set to work.  Materials: Plastic multipurpose 5" Zipper  Fabric Scraps Lightweight interfacing 808 Pellon Trims (We clipped  key fobs  with 1.5" swivel hooks onto our coin purses . There are tons of tutorials on making key fobs .) Step 1: Print out the Coin Purse Template  PDF.  Cut 2 main fabric, cut 2 lining and 2 interfacing using the template.  Optional: Cut a 2"X2" square of your choice main fabric or lining. This strip of fabric is used to clip a key fob to your coin purse later....

Fun in the Sun Mermaid Tutorial

Sewing Materials: 1/4 yard of Lycra or  5T or larger old swimsuit Thread Stretch Needle (helps) Sewing Machine and Sewing Notions Print the PDF patterns pieces out and tape them together. āœ„āœ„āœ„āœ„āœ„āœ„āœ„āœ„āœ„āœ„āœ„ āœ„āœ„āœ„āœ„ āœ„āœ„ Step 1: Cutting Layout-  Place the templates over the fabric and cut. āœ„āœ„āœ„āœ„āœ„āœ„āœ„āœ„āœ„āœ„āœ„ āœ„āœ„āœ„āœ„ āœ„āœ„ Step 2:   Fold the top edges of the mermaid tail and sew across. āœ„āœ„āœ„āœ„āœ„āœ„āœ„āœ„āœ„āœ„āœ„ āœ„āœ„āœ„āœ„ āœ„āœ„ Step 3: Place the mermaid tale pieces right sides together. Sew around the mermaid tail using the stretch stitch, it looks like a bolt of lighting. āœ„āœ„āœ„āœ„āœ„āœ„āœ„āœ„āœ„āœ„āœ„ āœ„āœ„āœ„āœ„ āœ„āœ„ Step 4: Flip the mermaid tail right side out using a chopstick.   Option: You can add Poly-fil to make the end of the tale puffy.   Set aside. āœ„āœ„āœ„āœ„āœ„āœ„āœ„āœ„āœ„āœ„āœ„ āœ„āœ„āœ„āœ„ āœ„āœ„ Bodice   Step 1: Cut a bodice measuring  4.5ā€ X1.5ā€ or use template. āœ„āœ„āœ„āœ„āœ„āœ„āœ„āœ„āœ„āœ„āœ„ āœ„āœ„āœ„āœ„ āœ„āœ„ Step 2: Fold the bodice right sides together and sew the  short ends making a loop. Use the e...

Cute as a Button Bookmark Tutorial

These are called Cute as a Button Bookmakers. They are cheap, easy to make and are wonderful gifts!  All you need is  Bookmarkers/ PaperClips Size 45 or 1 1/8" Button Covers and kit Glue Gun Pliers (which you won't need if you get the flat back buttons). Step 1: Make a few fabric covered buttons.  These are size 45 or 1 1/8" buttons. Step 2: If you use normal buttons you will need to take the loops off to make them flat. However you can buy flat back buttons and not have to worry about the loop. Step 3: Add a dab of hot glue to the top of the large paperclip pad and place your fabric button on top of the glue. Step 4: Let it cool and it's ready to use! Happy Crafting!