Set Up your embroidery machine!
I wanted to post this tutorial because I have had a lot of interest in embroidery projects.
I have had many emails and questions on the topic.
First, I want to tell you up front I am still learning about embroidery. When I find out all of the secrets of embroidery, I will write every one of them down for you. Second, I love my machine it is a Brother SE-270D. My hubby bought it at Overstock.com for an excellent price 3 Christmases ago. It still works like a dream. Although, I think I am ready to upgrade soon for more features. This machine is awesome, especially if you are new to embroidery. However it is also very basic. So if you are an embroidery expert, please share your knowledge! This tutorial is for beginners.
Ok here we go...
You might be wondering, why does Sew Spoiled has store bought stocking?? Doesn’t she sew everything? Well, these have been with our small family since we were a family. We are very attached to these, so I thought this year I would dress them up and embroidering our names on the cuffs.
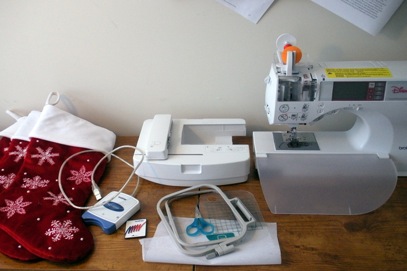
Supplies:
Stocking (store bought or handmade)
Embroidery Machine, Hoop, Embroidery Foot
Interfacing (I use Pellon 806, stitch and tear.)
Card Reader with computer software
(Only if your machine does not come with the font you want to use. I use PED-Basic. It is very inexpensive.)
Curls Font (If you have a brother machine you will use the PES format.)
Small Scissors
Seam Ripper
✄✄✄✄✄✄✄✄✄✄✄✄✄✄✄✄✄✄✄✄✄

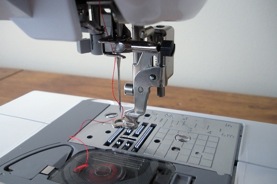
Step 1:
Take off the presser foot and put your embroidery foot on your machine.
✄✄✄✄✄✄✄✄✄✄✄✄✄✄✄✄✄✄✄✄✄

Step 2:
Place the hoop deck on the machine.
(If your machine sews and embroiders you will have to do this step.)
Make sure your top and bobbin threads are the correct color.
✄✄✄✄✄✄✄✄✄✄✄✄✄✄✄✄✄✄✄✄✄

Step 3:Place the stitch and tear interfacing into the hoop.
✄✄✄✄✄✄✄✄✄✄✄✄✄✄✄✄✄✄✄✄✄

Step 4: Place the hoop on to your machine. Now we are ready to start embroidering.
✄✄✄✄✄✄✄✄✄✄✄✄✄✄✄✄✄✄✄✄✄
Tomorrow we will embroider the Christmas Stockings!
Don’t forget the November giveaway is still going on!

Enjoy your Monday!
Comments