
Judy Moody Embroidery


Today I learned how to make images into embroidery designs with Stitch Era. At my house we love to read and one of our favorites is Judy Moody, anything Judy Moody. Of course an embroidery design would be awesome! My girls and I are also putting a quilt together. When I asked them what we should do with the test swatch, my oldest said, "make it a quilt block" and that is what we did.
I started with an easy one color design of Judy Moody. I had it from making the "Give your library bag character" post. I took it into Stitch Era, made it a vector image and the intelligent program wrote the embroidery file for me. Love That! A vector image is actually a mathematical formula, no matter how large or small the image is the resolution stays the same.  The embroidery software needs a vector image to create the embroidery stitches for your machine. 
It actually turned out really well!
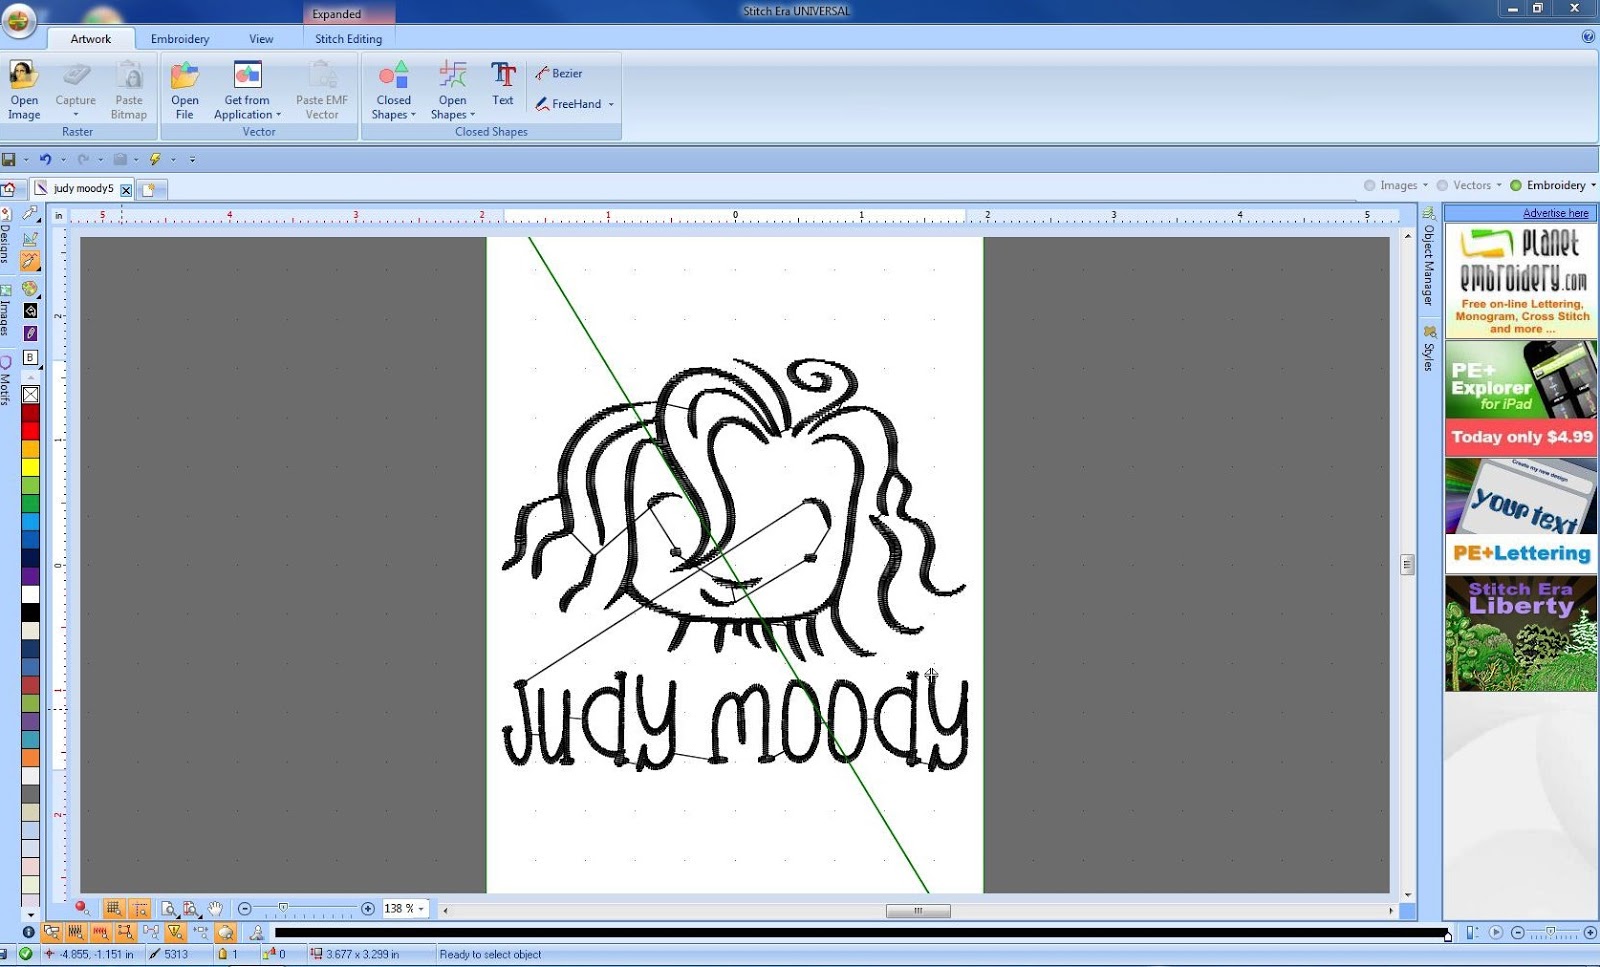
This was just from a book image! That is amazing right! Ok, I am going to have try some more designs. Stitch Era is free software and it is available right now. BUT Stitch Era has a warning on their site that it won't be available forever. I have already started looking for new software. I am also a Mac user, so I would like software for my newer Mac machine. I did find two options Essentials Embrilliance and Macbroidery. Both will let you move and manipulate images that are ready-made embroidery designs but neither allow you to create your own images. So I continue to search.
Thanks for stopping by!

Comments

The Mom said…
I can't wait to hear when you find a mac compatible software that will do it all. :)
Julia Robert said…
This comment has been removed by the author.
Julia Robert said…
This comment has been removed by the author.
Julia Robert said…
Love to see your Judy Moody embroidery digitizing designs.. This is really awesome. Great skills. Thank you..

Popular posts from this blog

Fun in the Sun Mermaid Tutorial

Sewing Materials: 1/4 yard of Lycra or  5T or larger old swimsuit Thread Stretch Needle (helps) Sewing Machine and Sewing Notions Print the PDF patterns pieces out and tape them together. ✄✄✄✄✄✄✄✄✄✄✄ ✄✄✄✄ ✄✄ Step 1: Cutting Layout-  Place the templates over the fabric and cut. ✄✄✄✄✄✄✄✄✄✄✄ ✄✄✄✄ ✄✄ Step 2:   Fold the top edges of the mermaid tail and sew across. ✄✄✄✄✄✄✄✄✄✄✄ ✄✄✄✄ ✄✄ Step 3: Place the mermaid tale pieces right sides together. Sew around the mermaid tail using the stretch stitch, it looks like a bolt of lighting. ✄✄✄✄✄✄✄✄✄✄✄ ✄✄✄✄ ✄✄ Step 4: Flip the mermaid tail right side out using a chopstick.   Option: You can add Poly-fil to make the end of the tale puffy.   Set aside. ✄✄✄✄✄✄✄✄✄✄✄ ✄✄✄✄ ✄✄ Bodice   Step 1: Cut a bodice measuring  4.5” X1.5” or use template. ✄✄✄✄✄✄✄✄✄✄✄ ✄✄✄✄ ✄✄ Step 2: Fold the bodice right sides together and sew the  short ends making a loop. Use the edge of the presser foot for your seam a

How to Line an A-Line Skirt Tutorial

 After you find an A-line skirt pattern , I am using  One Yard Wonders 101  template . Make a muslin of your skirt! It only takes a few minutes to make a muslin version. Just baste stitch the side seams and make adjustments for your hips. Once your template is right you can make all the skirts your heart desires, so it is important to get the perfect fit first. Now we are ready to cut the "good" fabric and sew! ---------------------------------- ---------------------------------- ---------------------------------- ---------------------------------- Flip the skirt right side out and put it on!! You are done!! It is super easy and your new skirt will look store made.  Plus there is no hand stitching the lining to the main fabric. If you have any questions please comment below or email me at leah.sewspoiled@gmail.com .  WooHooo!! A-Line Skirt Pattern Finds

Sweet Coin Purse Tutorial for Teacher Gifts

This time of year is so special to me because I get to show my gratitude for all of the hard work that goes into teaching my daughters. I love to make handmade gifts and this year is no exception. Since money does not grow on trees around here, I looked at my stash (I keep my scraps in hat boxes ) and tried to see what I had a lot of; small zippers, trims, Peltex strips ( from making iPad cases ), fabric scraps and some hardware for key fobs. So I set to work.  Materials: Plastic multipurpose 5" Zipper  Fabric Scraps Lightweight interfacing 808 Pellon Trims (We clipped  key fobs  with 1.5" swivel hooks onto our coin purses . There are tons of tutorials on making key fobs .) Step 1: Print out the Coin Purse Template  PDF.  Cut 2 main fabric, cut 2 lining and 2 interfacing using the template.  Optional: Cut a 2"X2" square of your choice main fabric or lining. This strip of fabric is used to clip a key fob to your coin purse later. We used a 1.5