
Fleece Jacket Makeover

Monogram heaven
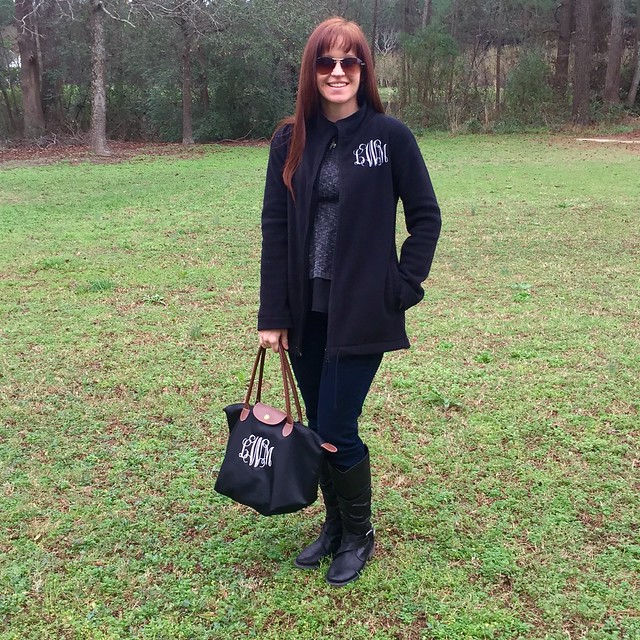
This is a cute picture, it looks almost too perfect right? You guessed it, this jacket was too large and an eye sore in my closet. I do not remember how I received it but it has been hanging in my closet for years!!! I almost donated it this year and then I changed my mind and gave it a makeover. Now I love to wear it and it is a wonderful staple in my wardrobe.
Over size fleece 2
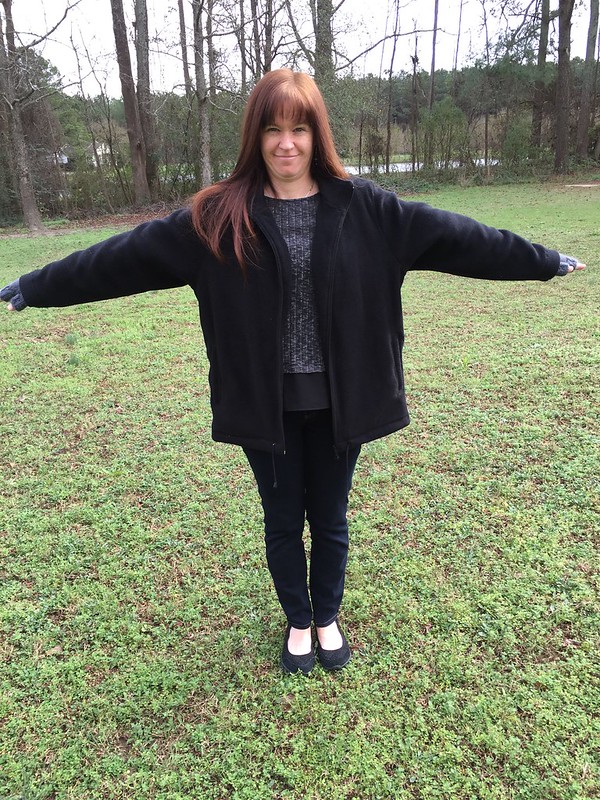
This is the original fleece jacket. The length in the sleeves and body of the coat were fine, so I left those alone. However, it needed adjusting under the arms and slim down the torso part of the coat.
Fleece jacket fix4
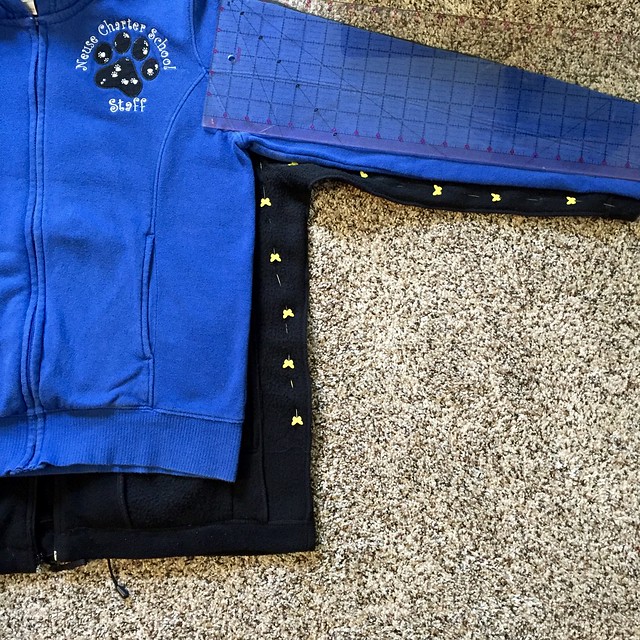
I turned the coat inside out and took a hoodie that fits and laid it over the fleece. Then I pinned the underarm and sides leaving alone the cuff and bottom hem. I had to take in the coat 4" from the underarm original seam to the new underarm seam. There are pockets on either side so I had to keep my stitches away from them.
Fleece jacket fix2
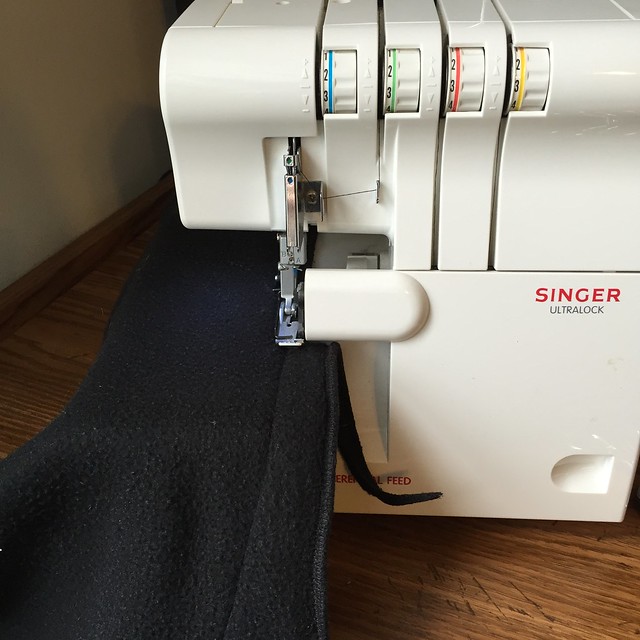
After sewing the underarm and side seam with my sewing machine, I decided to serge it to give my fleece jacket a finished look. Although if you do not have a serger, fleece does not unravel so this step is extra.
Serger 2
Look at the material just peeling away. Love it!
Embroidery 2
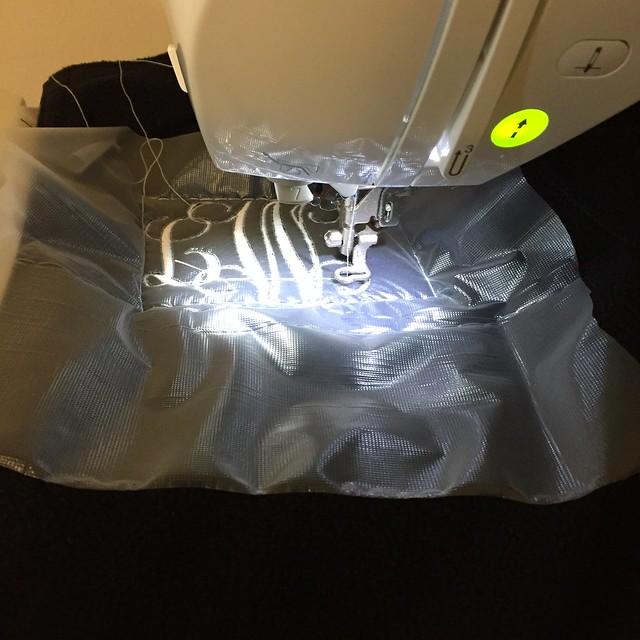
Next I monogrammed the left lapel with my initials. Now this is my favorite fleece jacket and a new staple in my wardrobe. Cost $0.00!!! Do you have garments in your closet that you pass over weekly?   Give them a makeover! Create new from old! I am going to dive into my closet and if I wear it I will leave it alone. If I never wear it, it is getting a Makeover! Makeover your closet today!
Happy sewing!

Comments

Unknown said…
FABULOUS!! What a great idea. I have several pieces from the 80's and 90's when "oversized" was the big thing. They are really nice tops and jackets, but they are a little goofy looking in today's time :) :). Thanks for the inspiration!

Popular posts from this blog

Sweet Coin Purse Tutorial for Teacher Gifts

This time of year is so special to me because I get to show my gratitude for all of the hard work that goes into teaching my daughters. I love to make handmade gifts and this year is no exception. Since money does not grow on trees around here, I looked at my stash (I keep my scraps in hat boxes ) and tried to see what I had a lot of; small zippers, trims, Peltex strips ( from making iPad cases ), fabric scraps and some hardware for key fobs. So I set to work.  Materials: Plastic multipurpose 5" Zipper  Fabric Scraps Lightweight interfacing 808 Pellon Trims (We clipped  key fobs  with 1.5" swivel hooks onto our coin purses . There are tons of tutorials on making key fobs .) Step 1: Print out the Coin Purse Template  PDF.  Cut 2 main fabric, cut 2 lining and 2 interfacing using the template.  Optional: Cut a 2"X2" square of your choice main fabric or lining. This strip of fabric is used to clip a key fob to your coin purse later....

Veruca Salt Dress

Every year we perform a musical and one of the highlights for me as a theater mom and seamstress is I get to make costumes! I love sewing and when I can sew for a show or for a music reason it is awesome! This year was Willy Wonka and the Chocolate Factory and I was able to recreate Veruca's red dress. The first step is to find a sewing pattern that I can manipulate to look like what the character needs.  I wanted to make the dress out of Pont de Roma fabric so it moved with the actress. Then I remembered the  Marianne Dress by Christine Haynes , it is perfect because it also had a peter pan collar. The peter pan collar did have some issues. I did not want a t-shirt binding. Also, the back of the collar did not have a collar. I drafted a back collar piece and since the opening was not stretchy, I created a keyhole with a button and loop closure. I lengthened the sleeves and used the cuffs from the pattern for long sleeves. Next, we added the buttons! We al...

Fun in the Sun Mermaid Tutorial

Sewing Materials: 1/4 yard of Lycra or  5T or larger old swimsuit Thread Stretch Needle (helps) Sewing Machine and Sewing Notions Print the PDF patterns pieces out and tape them together. ✄✄✄✄✄✄✄✄✄✄✄ ✄✄✄✄ ✄✄ Step 1: Cutting Layout-  Place the templates over the fabric and cut. ✄✄✄✄✄✄✄✄✄✄✄ ✄✄✄✄ ✄✄ Step 2:   Fold the top edges of the mermaid tail and sew across. ✄✄✄✄✄✄✄✄✄✄✄ ✄✄✄✄ ✄✄ Step 3: Place the mermaid tale pieces right sides together. Sew around the mermaid tail using the stretch stitch, it looks like a bolt of lighting. ✄✄✄✄✄✄✄✄✄✄✄ ✄✄✄✄ ✄✄ Step 4: Flip the mermaid tail right side out using a chopstick.   Option: You can add Poly-fil to make the end of the tale puffy.   Set aside. ✄✄✄✄✄✄✄✄✄✄✄ ✄✄✄✄ ✄✄ Bodice   Step 1: Cut a bodice measuring  4.5” X1.5” or use template. ✄✄✄✄✄✄✄✄✄✄✄ ✄✄✄✄ ✄✄ Step 2: Fold the bodice right sides together and sew the  short ends making a loop. Use the e...