I love seeing your Sew Spoiled projects! If you have completed a Sew Spoiled pattern add it to the Flickr Group, Your Sew Spoiled Projects! Also, I would like to start another Sew Along soon! I am just trying to decide what to sew?? If you have any suggestions please post a comment. Tomorrow I will post the giveaway for October. So check back tomorrow to see what the giveaway is.
Here are some fantastic Sew Spoiled projects created by women all over the world....

Square Bag created this wonderful Sew Spoiled Wristlet! Perfect for the Halloween season!

Lily Claire made this wristlet by enlarging the pattern by 25%. Looks great!

Cook Jar Scraps completed the Cabrio Tote and it looks amazing and ready for a fun filled trip!

This is the Ladybug Diaper Bag completed by Cook Jar Scraps! I love pink and green together!
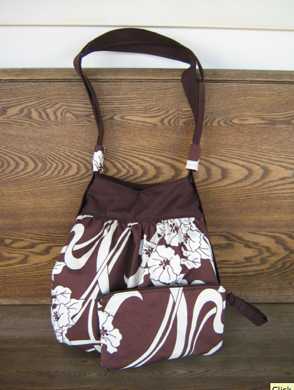
This Cabrio Tote was created by Mom to Esther in Amy Butler’s, August Fields! It is spectacular!

This iPad Folding Case was created by Grady’s Mommy. This fabric is so cool with hidden Disney ears all over!
Last but not least, can you sell the products you make from Sew Spoiled Patterns??? Yes, you can sell the products that you as a home seamstress make! All I ask is that you state, “This pattern is an original Sew Spoiled Design by Leah Williams.” in the description. It is super easy to set up your own shop at Etsy and a great place to start selling products. If you would like to know more about starting your own Etsy shop here is another link by Studio Jewel. Why not enjoy making money, doing what you love to do!
Happy Sewing!

Here are some fantastic Sew Spoiled projects created by women all over the world....
Square Bag created this wonderful Sew Spoiled Wristlet! Perfect for the Halloween season!
Lily Claire made this wristlet by enlarging the pattern by 25%. Looks great!
Cook Jar Scraps completed the Cabrio Tote and it looks amazing and ready for a fun filled trip!
This is the Ladybug Diaper Bag completed by Cook Jar Scraps! I love pink and green together!
This Cabrio Tote was created by Mom to Esther in Amy Butler’s, August Fields! It is spectacular!
This iPad Folding Case was created by Grady’s Mommy. This fabric is so cool with hidden Disney ears all over!
Last but not least, can you sell the products you make from Sew Spoiled Patterns??? Yes, you can sell the products that you as a home seamstress make! All I ask is that you state, “This pattern is an original Sew Spoiled Design by Leah Williams.” in the description. It is super easy to set up your own shop at Etsy and a great place to start selling products. If you would like to know more about starting your own Etsy shop here is another link by Studio Jewel. Why not enjoy making money, doing what you love to do!
Happy Sewing!
Comments