
Peek A Boo Toy Sack with a Sew Spoiled Twist!

Happy 4th of July Everyone! I hope you are enjoying your time with your families! 
This is my Twist on the Make it Perfect Peek A Boo Toy Sack tutorial! I was not sure if it would work so I did not take pictures but I have to make another for my oldest so pictures are on the way!
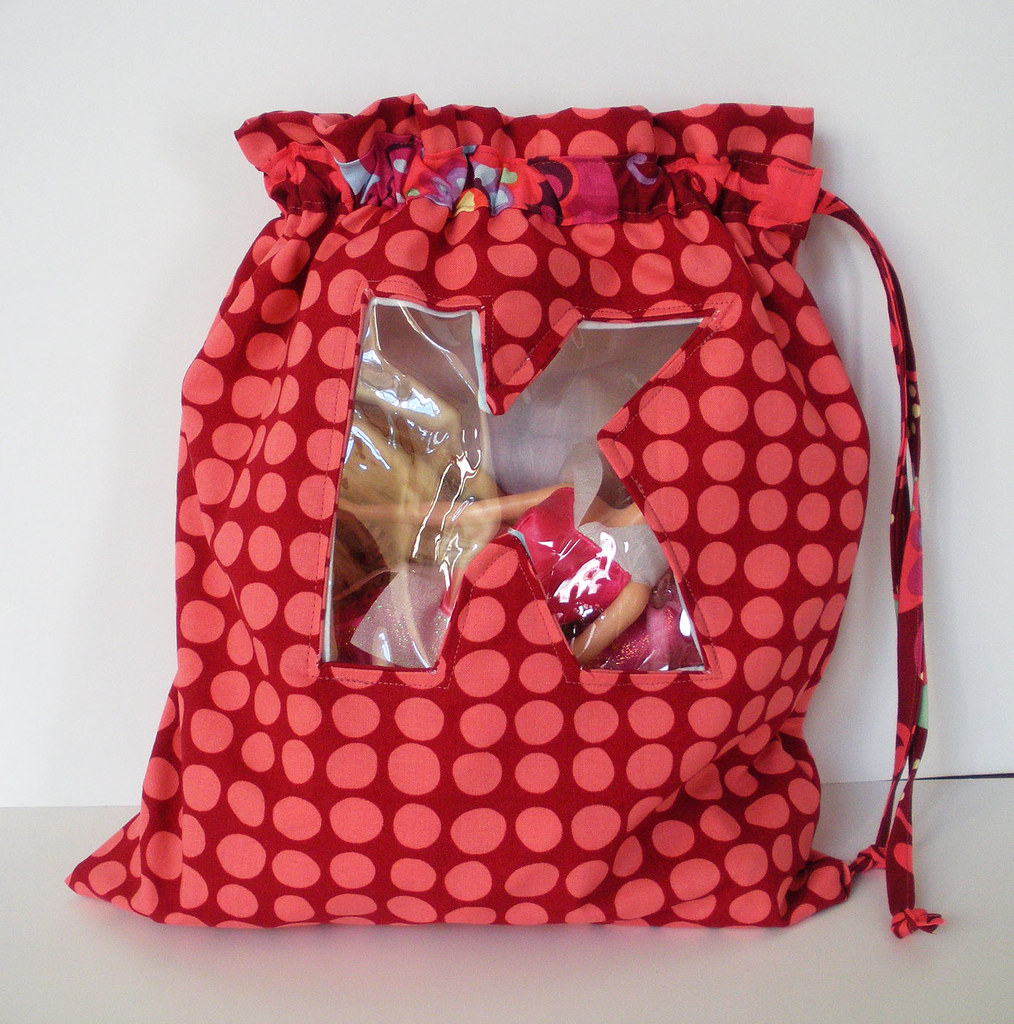
I saw these Peek A Boo toy sacks  from Make It Perfect and fell in love! I am a mother of two and toys are everywhere!!! This seemed like a great answer. 
I wanted to make them unique for my girls. I know what it is like to have a sister that you share everything with. I love adding an extra personal touch to make it just for them. That is why I made the "Peek A Boo" part the letter K.  I believe other letters can work too. 
Happy Stitching!
Leah

Comments

Country Mouse said…
These are super cute!!! I may have to try to make these!!! :)Thanks for the link to the tutorial!!!

Popular posts from this blog

Fun in the Sun Mermaid Tutorial

Sewing Materials: 1/4 yard of Lycra or  5T or larger old swimsuit Thread Stretch Needle (helps) Sewing Machine and Sewing Notions Print the PDF patterns pieces out and tape them together. ✄✄✄✄✄✄✄✄✄✄✄ ✄✄✄✄ ✄✄ Step 1: Cutting Layout-  Place the templates over the fabric and cut. ✄✄✄✄✄✄✄✄✄✄✄ ✄✄✄✄ ✄✄ Step 2:   Fold the top edges of the mermaid tail and sew across. ✄✄✄✄✄✄✄✄✄✄✄ ✄✄✄✄ ✄✄ Step 3: Place the mermaid tale pieces right sides together. Sew around the mermaid tail using the stretch stitch, it looks like a bolt of lighting. ✄✄✄✄✄✄✄✄✄✄✄ ✄✄✄✄ ✄✄ Step 4: Flip the mermaid tail right side out using a chopstick.   Option: You can add Poly-fil to make the end of the tale puffy.   Set aside. ✄✄✄✄✄✄✄✄✄✄✄ ✄✄✄✄ ✄✄ Bodice   Step 1: Cut a bodice measuring  4.5” X1.5” or use template. ✄✄✄✄✄✄✄✄✄✄✄ ✄✄✄✄ ✄✄ Step 2: Fold the bodice right sides together and sew the  short ends making a loop. Use the edge of the presser foot for your seam a

How to Line an A-Line Skirt Tutorial

 After you find an A-line skirt pattern , I am using  One Yard Wonders 101  template . Make a muslin of your skirt! It only takes a few minutes to make a muslin version. Just baste stitch the side seams and make adjustments for your hips. Once your template is right you can make all the skirts your heart desires, so it is important to get the perfect fit first. Now we are ready to cut the "good" fabric and sew! ---------------------------------- ---------------------------------- ---------------------------------- ---------------------------------- Flip the skirt right side out and put it on!! You are done!! It is super easy and your new skirt will look store made.  Plus there is no hand stitching the lining to the main fabric. If you have any questions please comment below or email me at leah.sewspoiled@gmail.com .  WooHooo!! A-Line Skirt Pattern Finds

Sweet Coin Purse Tutorial for Teacher Gifts

This time of year is so special to me because I get to show my gratitude for all of the hard work that goes into teaching my daughters. I love to make handmade gifts and this year is no exception. Since money does not grow on trees around here, I looked at my stash (I keep my scraps in hat boxes ) and tried to see what I had a lot of; small zippers, trims, Peltex strips ( from making iPad cases ), fabric scraps and some hardware for key fobs. So I set to work.  Materials: Plastic multipurpose 5" Zipper  Fabric Scraps Lightweight interfacing 808 Pellon Trims (We clipped  key fobs  with 1.5" swivel hooks onto our coin purses . There are tons of tutorials on making key fobs .) Step 1: Print out the Coin Purse Template  PDF.  Cut 2 main fabric, cut 2 lining and 2 interfacing using the template.  Optional: Cut a 2"X2" square of your choice main fabric or lining. This strip of fabric is used to clip a key fob to your coin purse later. We used a 1.5