
A Dress Story; the Passport

Screenshot2011-07-09at7.36.32AM-2011-07-11-07-30.png
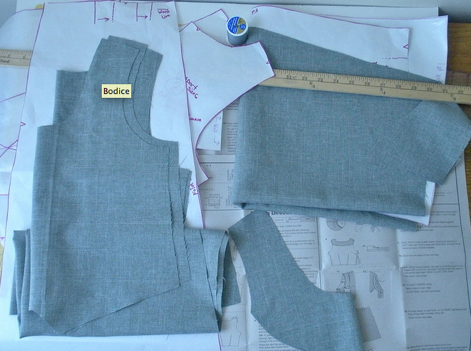
First I found suit fabric at Jo Ann’s for $3.50 per yard, so I bought 4 yards! When I got home I knew exactly what pattern to make first, the Lisette Passport. In order to keep all of the sizes, I traced it with freezer paper. There is only 6 pieces to sew together and 4 are the bodice.Screenshot2011-07-09at7.36.44AM-2011-07-11-07-30.png
I checked the pattern envelop and cut out the dress but as soon as I finished the bodice I knew it was too small.
Screenshot2011-07-09at7.36.56AM-2011-07-11-07-30.png
I started over and cut out a larger size but when I finished it was too large. 
At this point I wished I made a muslin!
Screenshot2011-07-09at7.37.06AM-2011-07-11-07-30.png
So third time was a charm and I made a third bodice and completed the dress.
Screenshot2011-07-09at7.37.22AM-2011-07-11-07-30.png
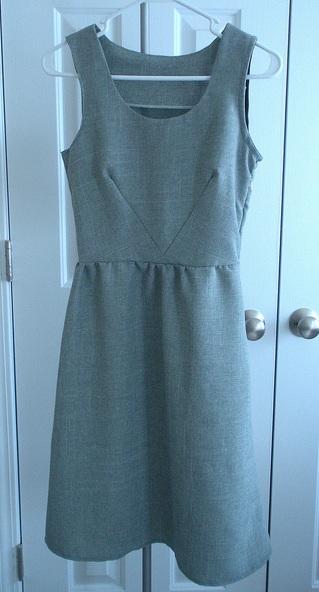
Lesson learned, next time I am going to make a muslin.
Here are a few great sites about making a muslin...
Happy dress making!
Leah

Comments

Thanks for sharing your experience. I think these patterns are cut too small as well. I have this particular pattern (haven't make it yet) but have made the Lisette Portfolio pattern and found the same thing. I had to adjust the sizing. I think a muslin is a must with this pattern series.
I am glad you had enough fabric to complete your dress!
Zoe said…
It turned out very pretty- making a muslin is a good idea, I just have to get over being to impatient to make it first!!
celkalee said…
I know I am impatient as well and resist the muslin. I am trying to adopt a sew-slow philosophy that gives me permission to go and test before cutting into the good stuff. Unfortunately, that is leading to some procrastination. Looking for a happy medium in process is the key for me. Your dress is very nice, the design lines are attractive and fresh. Thanks so much for sharing.
Sew Spoiled said…
Thanks everyone, it helps to talk about it:)
I guess that is why I love bags, one size fits all. I do want to sew more clothes for myself. Maybe if I continue sew garments I will find the perfect fit.
Smiles!

Popular posts from this blog

Sweet Coin Purse Tutorial for Teacher Gifts

This time of year is so special to me because I get to show my gratitude for all of the hard work that goes into teaching my daughters. I love to make handmade gifts and this year is no exception. Since money does not grow on trees around here, I looked at my stash (I keep my scraps in hat boxes ) and tried to see what I had a lot of; small zippers, trims, Peltex strips ( from making iPad cases ), fabric scraps and some hardware for key fobs. So I set to work.  Materials: Plastic multipurpose 5" Zipper  Fabric Scraps Lightweight interfacing 808 Pellon Trims (We clipped  key fobs  with 1.5" swivel hooks onto our coin purses . There are tons of tutorials on making key fobs .) Step 1: Print out the Coin Purse Template  PDF.  Cut 2 main fabric, cut 2 lining and 2 interfacing using the template.  Optional: Cut a 2"X2" square of your choice main fabric or lining. This strip of fabric is used to clip a key fob to your coin purse later....

Fun in the Sun Mermaid Tutorial

Sewing Materials: 1/4 yard of Lycra or  5T or larger old swimsuit Thread Stretch Needle (helps) Sewing Machine and Sewing Notions Print the PDF patterns pieces out and tape them together. ✄✄✄✄✄✄✄✄✄✄✄ ✄✄✄✄ ✄✄ Step 1: Cutting Layout-  Place the templates over the fabric and cut. ✄✄✄✄✄✄✄✄✄✄✄ ✄✄✄✄ ✄✄ Step 2:   Fold the top edges of the mermaid tail and sew across. ✄✄✄✄✄✄✄✄✄✄✄ ✄✄✄✄ ✄✄ Step 3: Place the mermaid tale pieces right sides together. Sew around the mermaid tail using the stretch stitch, it looks like a bolt of lighting. ✄✄✄✄✄✄✄✄✄✄✄ ✄✄✄✄ ✄✄ Step 4: Flip the mermaid tail right side out using a chopstick.   Option: You can add Poly-fil to make the end of the tale puffy.   Set aside. ✄✄✄✄✄✄✄✄✄✄✄ ✄✄✄✄ ✄✄ Bodice   Step 1: Cut a bodice measuring  4.5” X1.5” or use template. ✄✄✄✄✄✄✄✄✄✄✄ ✄✄✄✄ ✄✄ Step 2: Fold the bodice right sides together and sew the  short ends making a loop. Use the e...

Cute as a Button Bookmark Tutorial

These are called Cute as a Button Bookmakers. They are cheap, easy to make and are wonderful gifts!  All you need is  Bookmarkers/ PaperClips Size 45 or 1 1/8" Button Covers and kit Glue Gun Pliers (which you won't need if you get the flat back buttons). Step 1: Make a few fabric covered buttons.  These are size 45 or 1 1/8" buttons. Step 2: If you use normal buttons you will need to take the loops off to make them flat. However you can buy flat back buttons and not have to worry about the loop. Step 3: Add a dab of hot glue to the top of the large paperclip pad and place your fabric button on top of the glue. Step 4: Let it cool and it's ready to use! Happy Crafting!