
My new Brother

My new machine by Sew Spoiled
My new machine, a photo by Sew Spoiled on Flickr.
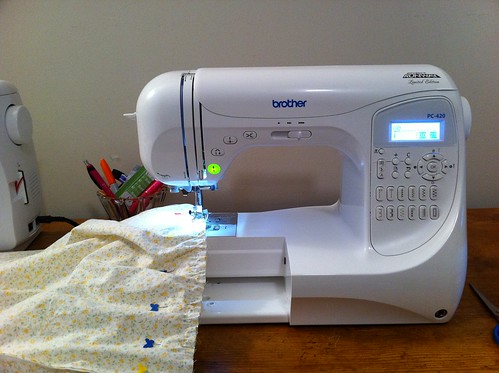
I love my new Brother PC420. It is so easy to use and the manual explains everything so clearly with pictures and diagrams. I have tried many of the stitches and I have not had any problems with any of them. However, there are so many I have only scratched the surface. The bottom two rows of buttons are the most commonly used stitches. If you click on the picture above it will take you to Flickr, I have labeled some of the others. I love all of the accessories and feet!!! It is an incredible buy! So far I am very happy with it. Make sure if you do purchase this machine that you buy the larger bobbins that the machine asks for. I am so happy!
I have to go back to sewing on it, Bye!
Here are some reviews…


Comments

Anonymous said…
It looks sweet! Keep us posted if you have any issues, I may be on the market for something high-tech soon. I sew on my mom's 1970's Viking. It actually is a fantastic machine but obviously does not have the computer screen with the stitch selection and everything.
Ginger said…
Enjoy your new machine!
Shirley said…
I have this one too and I LOVE it!!!!! The decorative stitches are terrific. Happy sewing! :)
Lynne in NC said…
So happy for you. :)

Popular posts from this blog

Sweet Coin Purse Tutorial for Teacher Gifts

This time of year is so special to me because I get to show my gratitude for all of the hard work that goes into teaching my daughters. I love to make handmade gifts and this year is no exception. Since money does not grow on trees around here, I looked at my stash (I keep my scraps in hat boxes ) and tried to see what I had a lot of; small zippers, trims, Peltex strips ( from making iPad cases ), fabric scraps and some hardware for key fobs. So I set to work.  Materials: Plastic multipurpose 5" Zipper  Fabric Scraps Lightweight interfacing 808 Pellon Trims (We clipped  key fobs  with 1.5" swivel hooks onto our coin purses . There are tons of tutorials on making key fobs .) Step 1: Print out the Coin Purse Template  PDF.  Cut 2 main fabric, cut 2 lining and 2 interfacing using the template.  Optional: Cut a 2"X2" square of your choice main fabric or lining. This strip of fabric is used to clip a key fob to your coin purse later....

May 2011 Giveaway!

Thank you Sew Mama Sew for making today, May 23, 2011 Giveaway Day! Sew Love Fabrics will be sponsoring this month’s giveaway with eight fat quarters (18”X 22”) of Prince Charming prints in olive green, equaling 2 yards of gorgeous fabrics! If you would like to read more about Ruth, founder of Sew Love Fabrics , read her interview . Thank you so much for sharing your love of fabric with us! These are the fat quarters ready to ship to the lucky winner!! Giveaway Rules! +Our Giveaway will run May 23-27, 2011, with the winner being announced May 28, 2011! +The winner will be selected by Random.org +The package will be shipped to the winner by May 30, 2011. + To enter to win post a comment on this blog post! +Only one comment please per person. +This giveaway is open to everyone. +Leave your EMAIL ADDRESS, you can leave it as: leah(dot)sewspoiled(at)gamil(dot)com +This giveaway ends May 27, 2011 at 8PM Eastern Standard Time Thank you Ruth for sponsoring our May giveaway from Sew Love ...

Veruca Salt Dress

Every year we perform a musical and one of the highlights for me as a theater mom and seamstress is I get to make costumes! I love sewing and when I can sew for a show or for a music reason it is awesome! This year was Willy Wonka and the Chocolate Factory and I was able to recreate Veruca's red dress. The first step is to find a sewing pattern that I can manipulate to look like what the character needs.  I wanted to make the dress out of Pont de Roma fabric so it moved with the actress. Then I remembered the  Marianne Dress by Christine Haynes , it is perfect because it also had a peter pan collar. The peter pan collar did have some issues. I did not want a t-shirt binding. Also, the back of the collar did not have a collar. I drafted a back collar piece and since the opening was not stretchy, I created a keyhole with a button and loop closure. I lengthened the sleeves and used the cuffs from the pattern for long sleeves. Next, we added the buttons! We al...