
Update on the Weekender Tote Project!


I usually post on the weekends but this weekend was a little crazy! We went to see my little brother graduate from USC and then it was Mommy's Day. 
Happy Mother's day to all of you who are Mothers too!
Hopefully you have cut all of your pieces out and you are ready to start to assemble of the Sew Spoiled Weekender Tote! The first step in the pattern is to make the Outer Shell Pleats. Outer Shell Pleats - - - - - - - - - - - - -May 9- May 15
Straps and finish Outer Shell- - - - - -May 16- May 22
Pockets and Magnet Clasp - - - - - - May 23- May 29
Lining and Finish the Tote- - - - - - - May 30- June 5
Here are some pictures from the Sew Spoiled Weekender Tote Project Flickr group.

EmilySue has posted her recent work! Not only has she sewn the outer shell pleat fabrics together but she has fused her interfacing. Now she is ready for pleating!


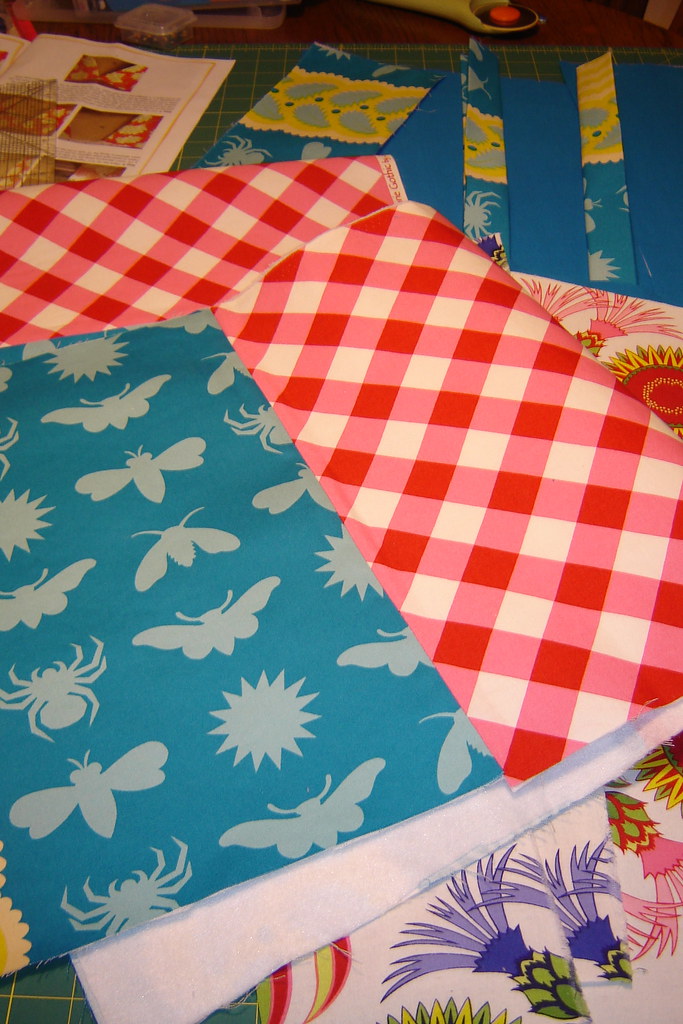
Sweet.Limes' Photostream Cut and ready!


Selvedge's photostream Cut and ready!


MyCalicoHearts's photostream Cut and ready!


Jennie0426's Photostream Looking good!


Ksequera514's Photostream Cut and ready!


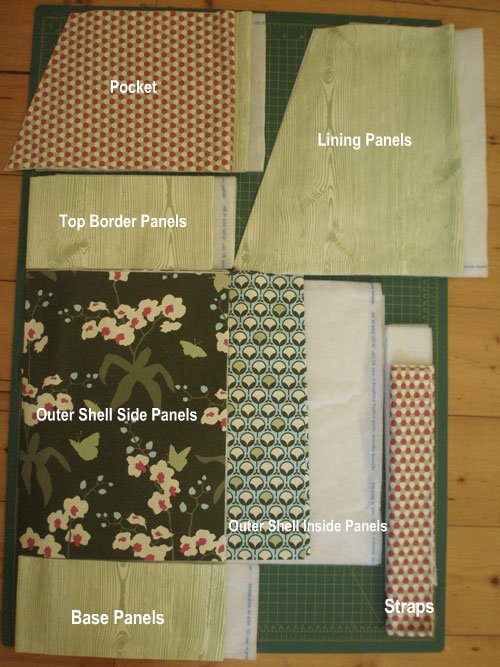
The AccidentalCrafters' photostream Cut and ready!


9Crafty11's photostream Cut and ready to go!


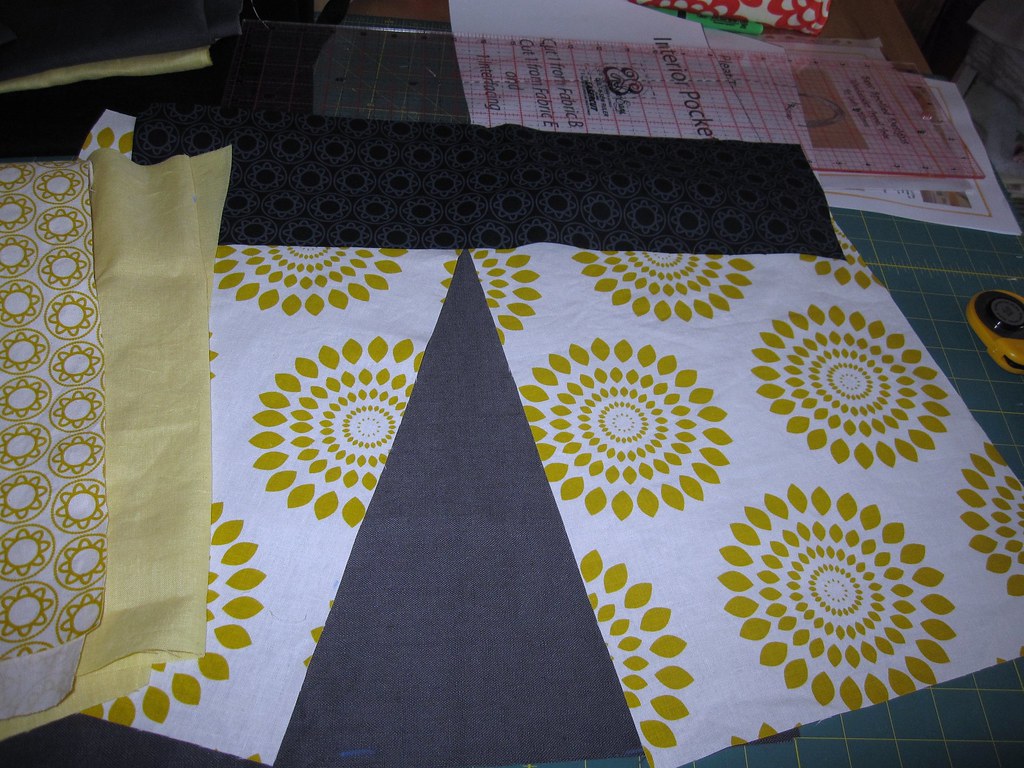
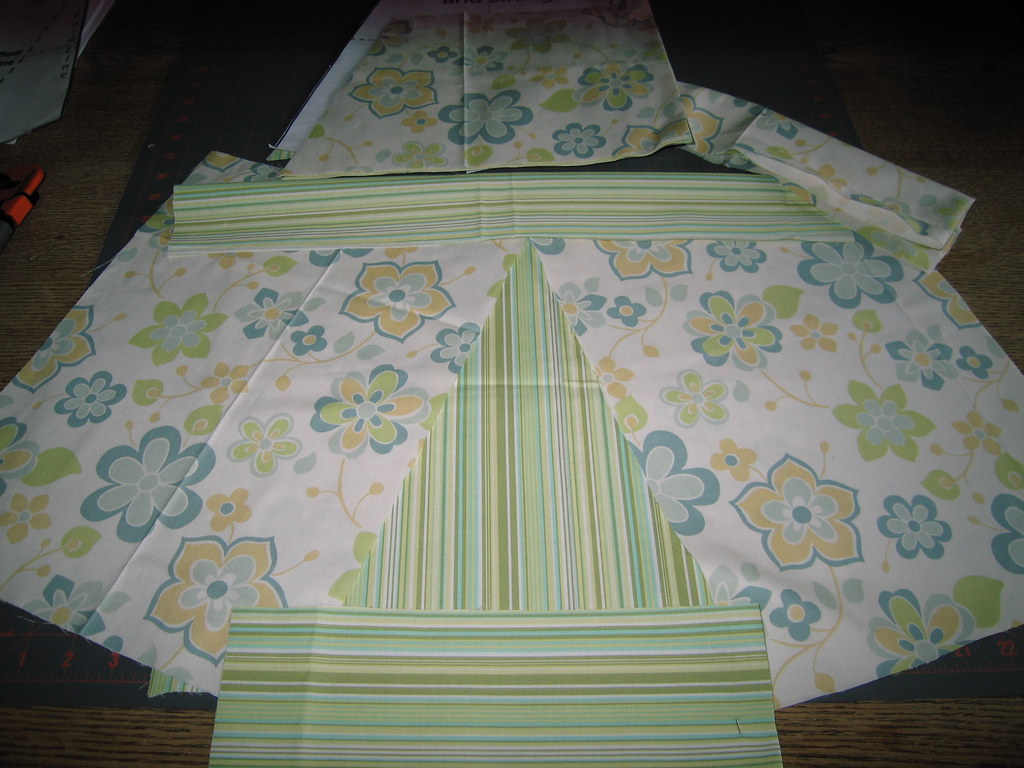
AKing2008's photostream, this is what it looks like when you are sewing the Fabric A panels to either side of the Fabric B panels. You must do this before fusing the interfacing! 
Great picture!


MarySuewys' photostream Cut and ready!


CarrieMePics' photostream Cut and ready!


MamaLusco's photostream Cut and Ready!


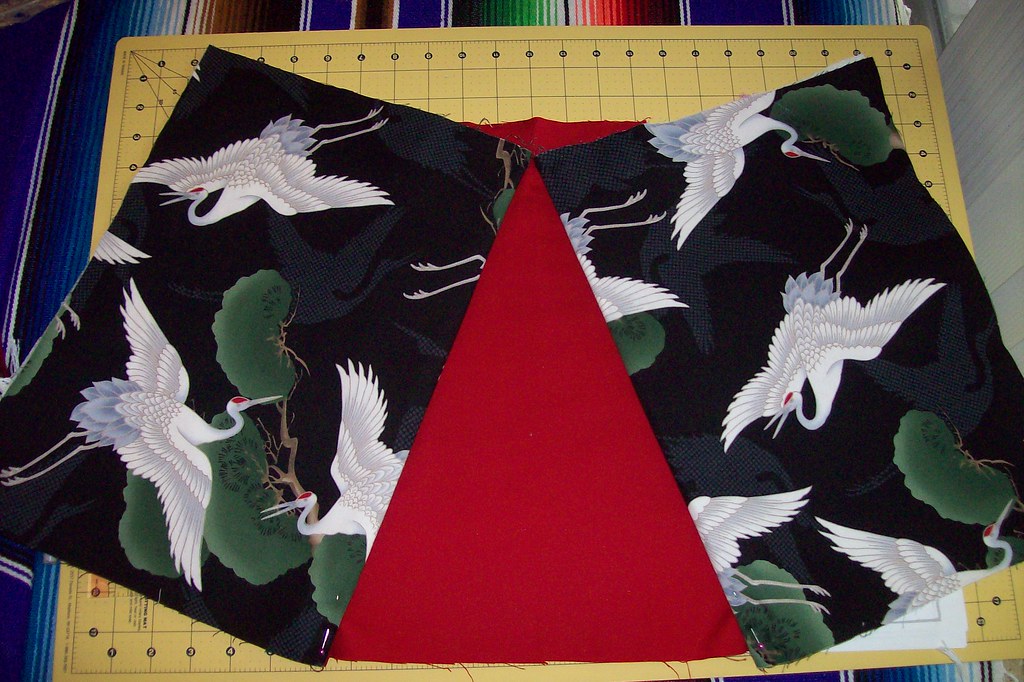
Icky Ricky's Photostream, this is what it looks like after the Fabric A and B panels are sewn together, fused with the interfacing and the pleat is ready to be sewn across. Tip: Before I sew the pleat, I like to take the pleat template and place it over the pleat to make sure that everything will look right when I go you cut out the pleat shape.
I promise to sew and post more pictures! If you are like me once a project is cut out, it is very hard not to complete it! All I ask of those of you who might be going ahead and completing your totes early, is to post pictures of your progress to 
Thank you for all of the amazing pictures!
~Leah

Comments

yumiax said…
It's encouraging to see other people's progress!
Gotta start catching up!

Popular posts from this blog

Sweet Coin Purse Tutorial for Teacher Gifts

This time of year is so special to me because I get to show my gratitude for all of the hard work that goes into teaching my daughters. I love to make handmade gifts and this year is no exception. Since money does not grow on trees around here, I looked at my stash (I keep my scraps in hat boxes ) and tried to see what I had a lot of; small zippers, trims, Peltex strips ( from making iPad cases ), fabric scraps and some hardware for key fobs. So I set to work.  Materials: Plastic multipurpose 5" Zipper  Fabric Scraps Lightweight interfacing 808 Pellon Trims (We clipped  key fobs  with 1.5" swivel hooks onto our coin purses . There are tons of tutorials on making key fobs .) Step 1: Print out the Coin Purse Template  PDF.  Cut 2 main fabric, cut 2 lining and 2 interfacing using the template.  Optional: Cut a 2"X2" square of your choice main fabric or lining. This strip of fabric is used to clip a key fob to your coin purse later....

Veruca Salt Dress

Every year we perform a musical and one of the highlights for me as a theater mom and seamstress is I get to make costumes! I love sewing and when I can sew for a show or for a music reason it is awesome! This year was Willy Wonka and the Chocolate Factory and I was able to recreate Veruca's red dress. The first step is to find a sewing pattern that I can manipulate to look like what the character needs.  I wanted to make the dress out of Pont de Roma fabric so it moved with the actress. Then I remembered the  Marianne Dress by Christine Haynes , it is perfect because it also had a peter pan collar. The peter pan collar did have some issues. I did not want a t-shirt binding. Also, the back of the collar did not have a collar. I drafted a back collar piece and since the opening was not stretchy, I created a keyhole with a button and loop closure. I lengthened the sleeves and used the cuffs from the pattern for long sleeves. Next, we added the buttons! We al...

May 2011 Giveaway!

Thank you Sew Mama Sew for making today, May 23, 2011 Giveaway Day! Sew Love Fabrics will be sponsoring this month’s giveaway with eight fat quarters (18”X 22”) of Prince Charming prints in olive green, equaling 2 yards of gorgeous fabrics! If you would like to read more about Ruth, founder of Sew Love Fabrics , read her interview . Thank you so much for sharing your love of fabric with us! These are the fat quarters ready to ship to the lucky winner!! Giveaway Rules! +Our Giveaway will run May 23-27, 2011, with the winner being announced May 28, 2011! +The winner will be selected by Random.org +The package will be shipped to the winner by May 30, 2011. + To enter to win post a comment on this blog post! +Only one comment please per person. +This giveaway is open to everyone. +Leave your EMAIL ADDRESS, you can leave it as: leah(dot)sewspoiled(at)gamil(dot)com +This giveaway ends May 27, 2011 at 8PM Eastern Standard Time Thank you Ruth for sponsoring our May giveaway from Sew Love ...