
Weekender Tote Sew along: Pockets and Lining with Magnet

Here is another bundle of fantastic pictures from our Sew Spoiled Weekender Tote Project. If you love sewing you are going to love these sweet pics.  
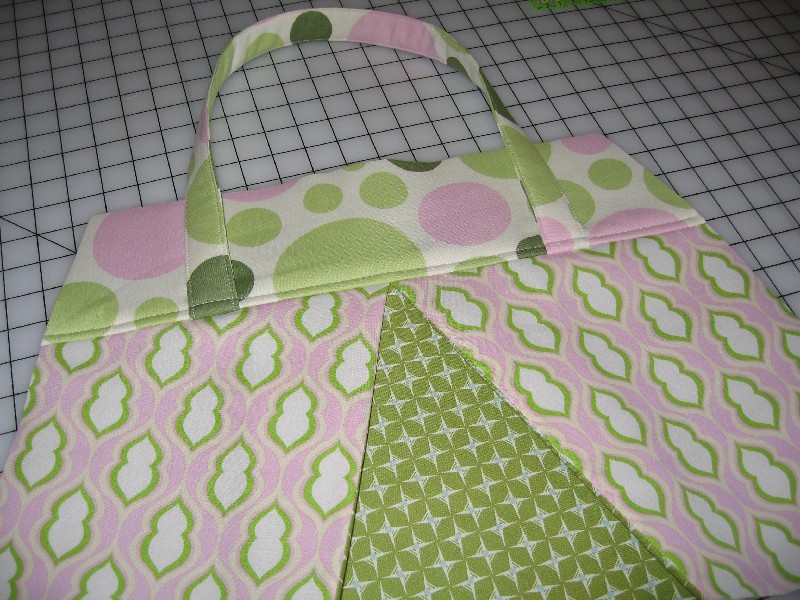
First, from Pink Stargazer, she is finished with the outer shell panels and they look amazing! I adore Heather Bailey's Nicey Jane collection that is exactly what she and her friend Raygan used! The pictures below are Raygan's bag. You two are going to have to go out together with your fab bags on! Girls weekend!

Raygan's bag from Pink Stargazer flickr photostream. I know there are no handles, remember this is the bag to watch, she will be using bamboo handles!


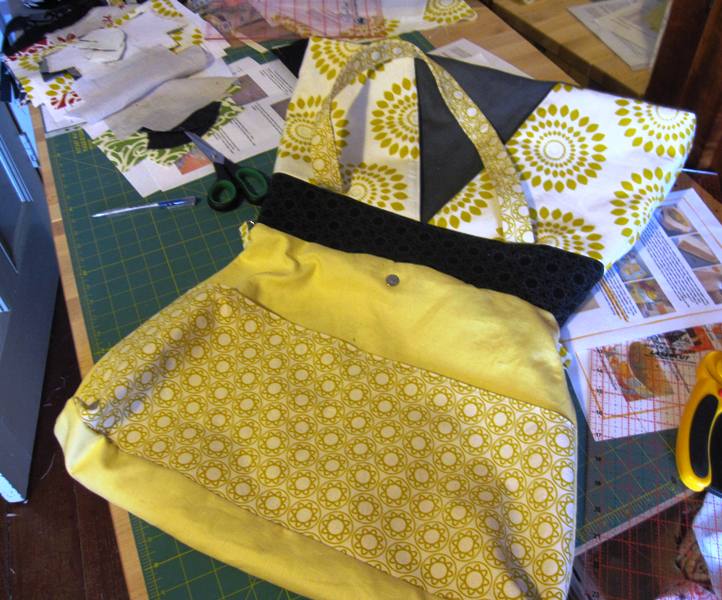
Then, 9crafty11, showed us what the birth of a bag looks like! :) Flipping her tote right side out for everyone to see! The mother of this Weekender Tote must be extra proud! I love that she added purse feet. I might have to join you with the purse feet idea.

Gorgeous 9crafty11!

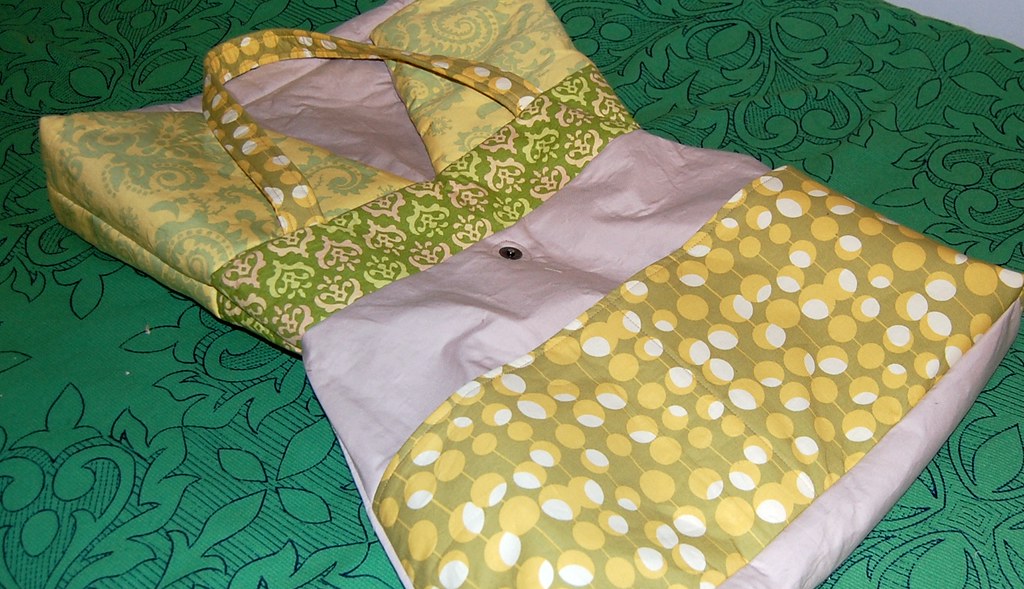
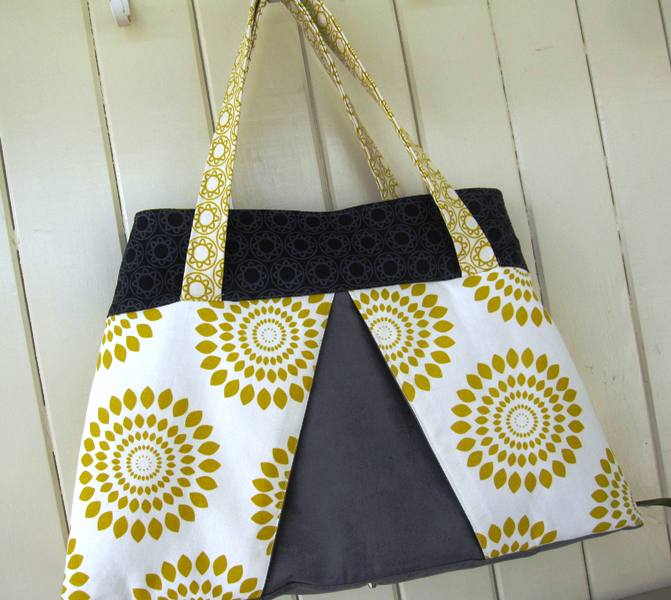
Le Touche-À-Tout is making her Weekender Tote from fabrics designed by Amy Butler. I love the colors. Don't you love it when someone asks, "Where did you buy that?" and you have to reply, "I made it." I imagine you will be hearing that a lot!

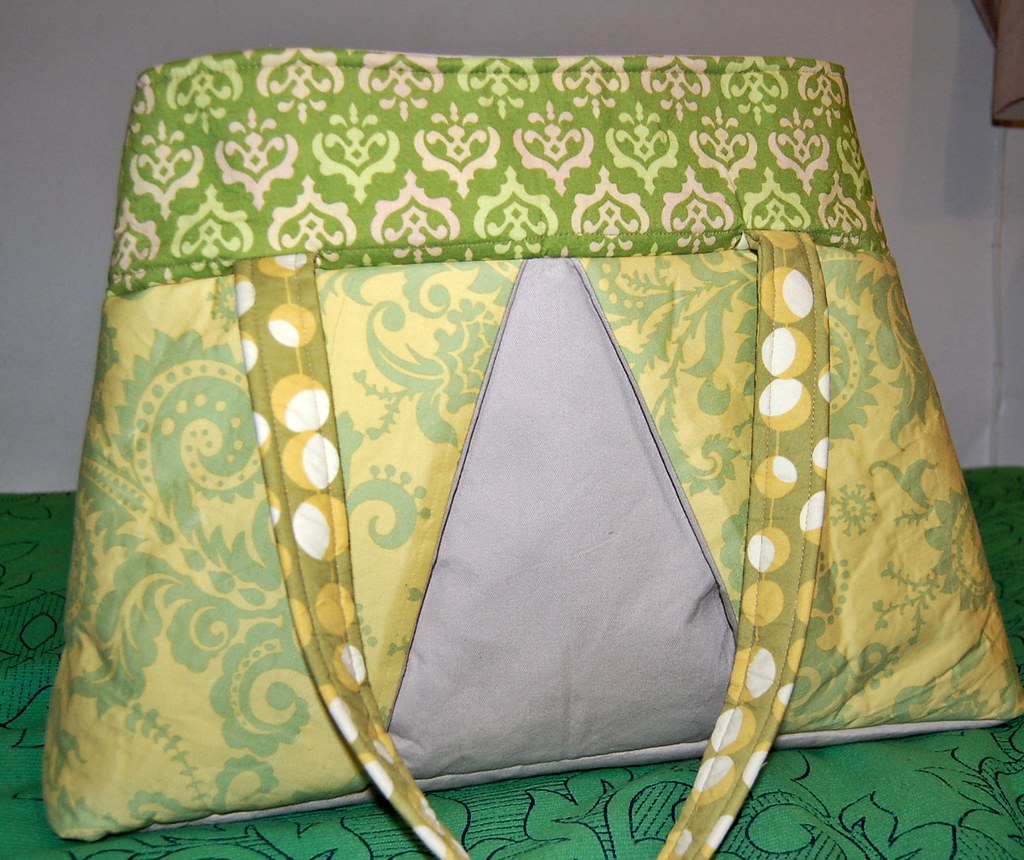
Le Touche-À-Tout's finished Weekender Tote!

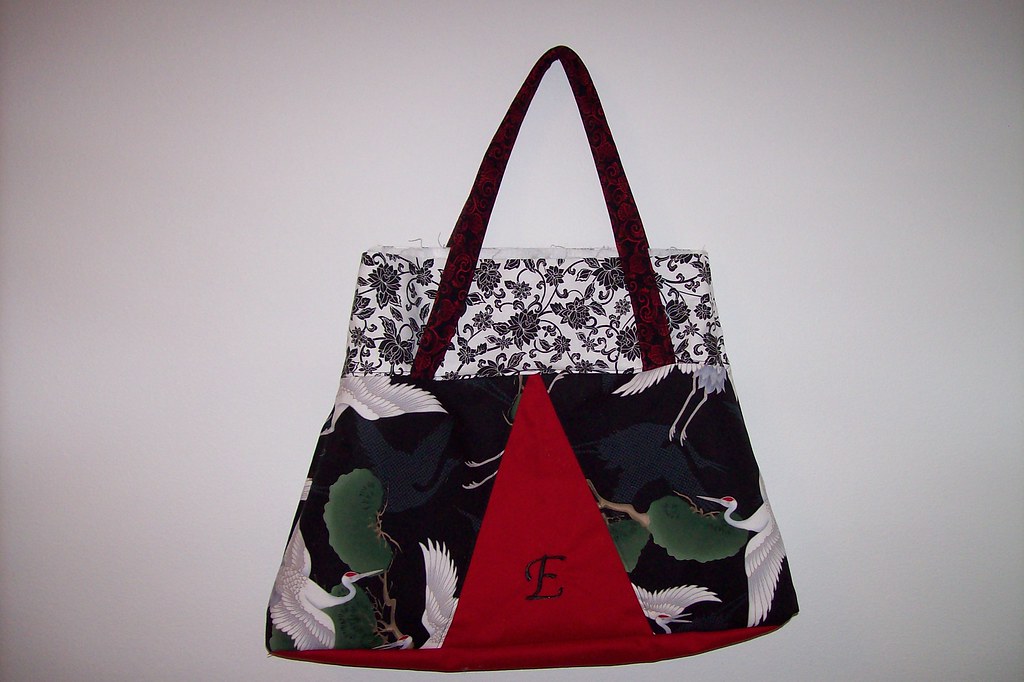
This is Icky Ricky's outer shell! I am impressed by the embroidery. The cranes are ready to fly you to a new adventure! Wonderful job!
Thank you everyone for sharing pictures of you Weekender Totes and taking us through your sewing journey. Make sure you check back for more updates on our Weekender Tote Sew Along!

Comments

yumiax said…
Leah, thanks for initiating this sew-along as well as the great pattern! I really enjoyed the whole process. Now time to go on the street to show off my hand-made tote, yey!

Popular posts from this blog

Fun in the Sun Mermaid Tutorial

Sewing Materials: 1/4 yard of Lycra or  5T or larger old swimsuit Thread Stretch Needle (helps) Sewing Machine and Sewing Notions Print the PDF patterns pieces out and tape them together. ✄✄✄✄✄✄✄✄✄✄✄ ✄✄✄✄ ✄✄ Step 1: Cutting Layout-  Place the templates over the fabric and cut. ✄✄✄✄✄✄✄✄✄✄✄ ✄✄✄✄ ✄✄ Step 2:   Fold the top edges of the mermaid tail and sew across. ✄✄✄✄✄✄✄✄✄✄✄ ✄✄✄✄ ✄✄ Step 3: Place the mermaid tale pieces right sides together. Sew around the mermaid tail using the stretch stitch, it looks like a bolt of lighting. ✄✄✄✄✄✄✄✄✄✄✄ ✄✄✄✄ ✄✄ Step 4: Flip the mermaid tail right side out using a chopstick.   Option: You can add Poly-fil to make the end of the tale puffy.   Set aside. ✄✄✄✄✄✄✄✄✄✄✄ ✄✄✄✄ ✄✄ Bodice   Step 1: Cut a bodice measuring  4.5” X1.5” or use template. ✄✄✄✄✄✄✄✄✄✄✄ ✄✄✄✄ ✄✄ Step 2: Fold the bodice right sides together and sew the  short ends making a loop. Use the edge of the presser foot for your seam a

How to Line an A-Line Skirt Tutorial

 After you find an A-line skirt pattern , I am using  One Yard Wonders 101  template . Make a muslin of your skirt! It only takes a few minutes to make a muslin version. Just baste stitch the side seams and make adjustments for your hips. Once your template is right you can make all the skirts your heart desires, so it is important to get the perfect fit first. Now we are ready to cut the "good" fabric and sew! ---------------------------------- ---------------------------------- ---------------------------------- ---------------------------------- Flip the skirt right side out and put it on!! You are done!! It is super easy and your new skirt will look store made.  Plus there is no hand stitching the lining to the main fabric. If you have any questions please comment below or email me at leah.sewspoiled@gmail.com .  WooHooo!! A-Line Skirt Pattern Finds

Sweet Coin Purse Tutorial for Teacher Gifts

This time of year is so special to me because I get to show my gratitude for all of the hard work that goes into teaching my daughters. I love to make handmade gifts and this year is no exception. Since money does not grow on trees around here, I looked at my stash (I keep my scraps in hat boxes ) and tried to see what I had a lot of; small zippers, trims, Peltex strips ( from making iPad cases ), fabric scraps and some hardware for key fobs. So I set to work.  Materials: Plastic multipurpose 5" Zipper  Fabric Scraps Lightweight interfacing 808 Pellon Trims (We clipped  key fobs  with 1.5" swivel hooks onto our coin purses . There are tons of tutorials on making key fobs .) Step 1: Print out the Coin Purse Template  PDF.  Cut 2 main fabric, cut 2 lining and 2 interfacing using the template.  Optional: Cut a 2"X2" square of your choice main fabric or lining. This strip of fabric is used to clip a key fob to your coin purse later. We used a 1.5