
Weekender Tote Sew-a-long: the end of Pleat Week!

Here is a new update from our Sew Spoiled Weekender Tote Project flickr group's progress! Everyone seems to be sewing at their own pace. Some have skipped ahead to the last chapter of the book and some are still looking at the contents page:) Wherever you are it is important that you sew at your own tempo. If you are having a hard time getting started, these pictures should inspire you to jump aboard next week's sew a long where we will finish the outer shell!!! If you are wondering where my pictures are I am planning to post some tonight. However, I recently bought a flip video camera and I thought I would try some of the steps on video but the camera has not come in yet!  :(  Anyway, the more I look at this sew a long the more I realize it is not about me. Honestly, it is all about you! Your progress what you have learned and showing off your talents!!
This is Le Touche-A-Tout's step 2, page 4. She also has a wonderful blog at Le Touche-A-Tout

This is step 2 completed!


Step 3 started...


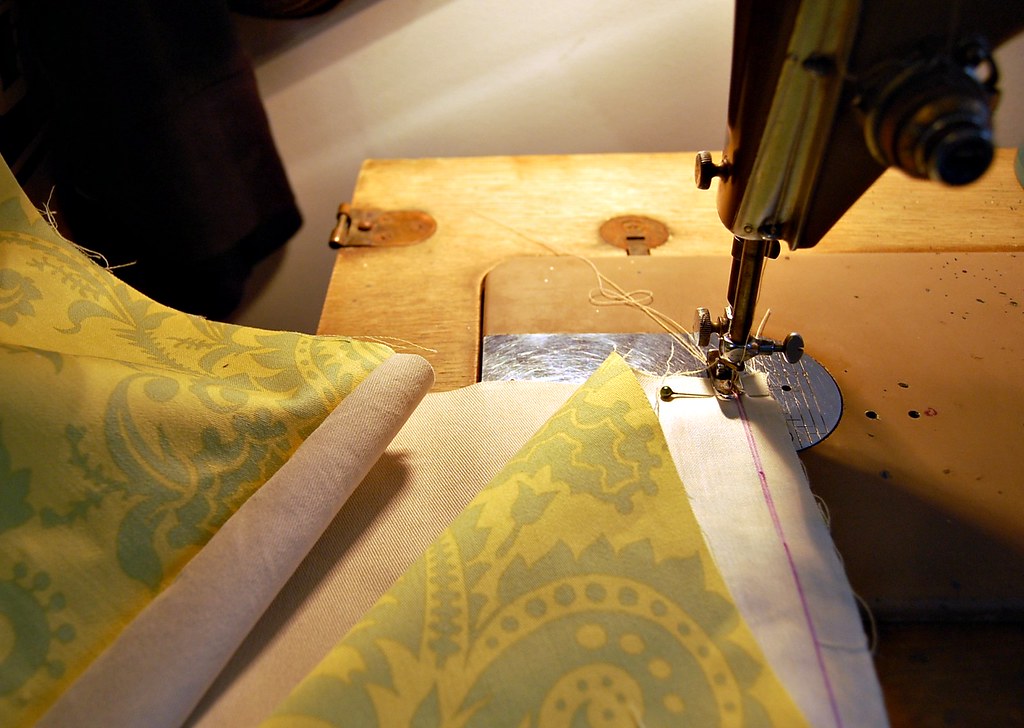
I have seen a few in our group topstitch the pleats edge.
By the way, I heart your Singer Le Touche-A-Tout!

New Photostream!
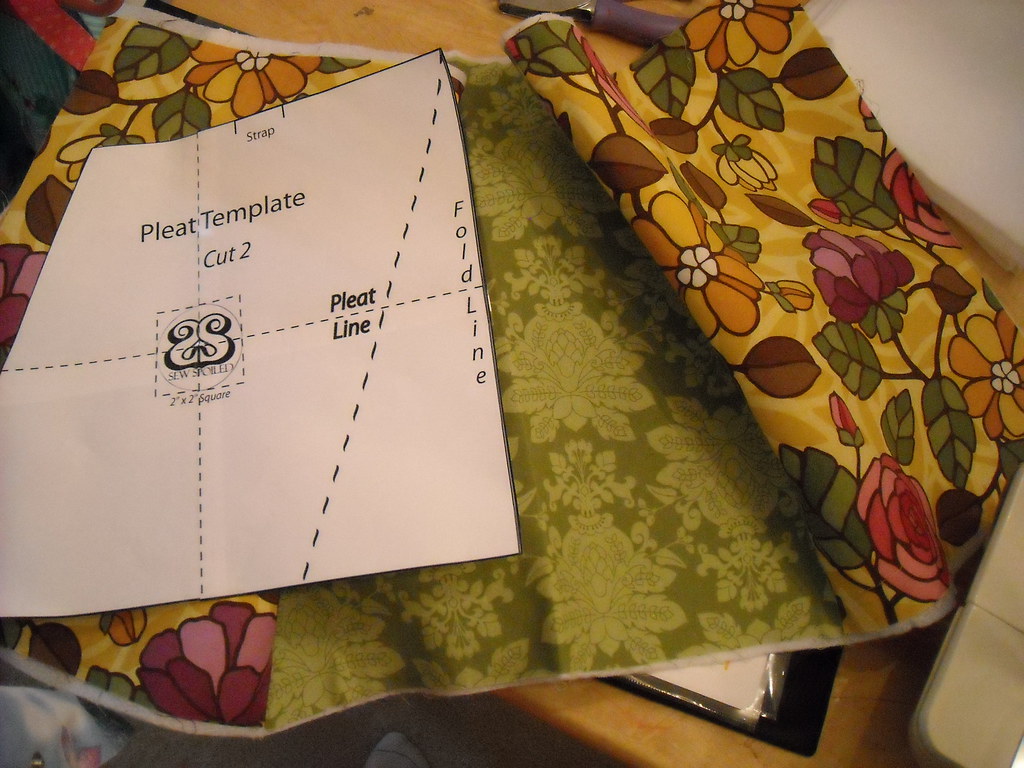
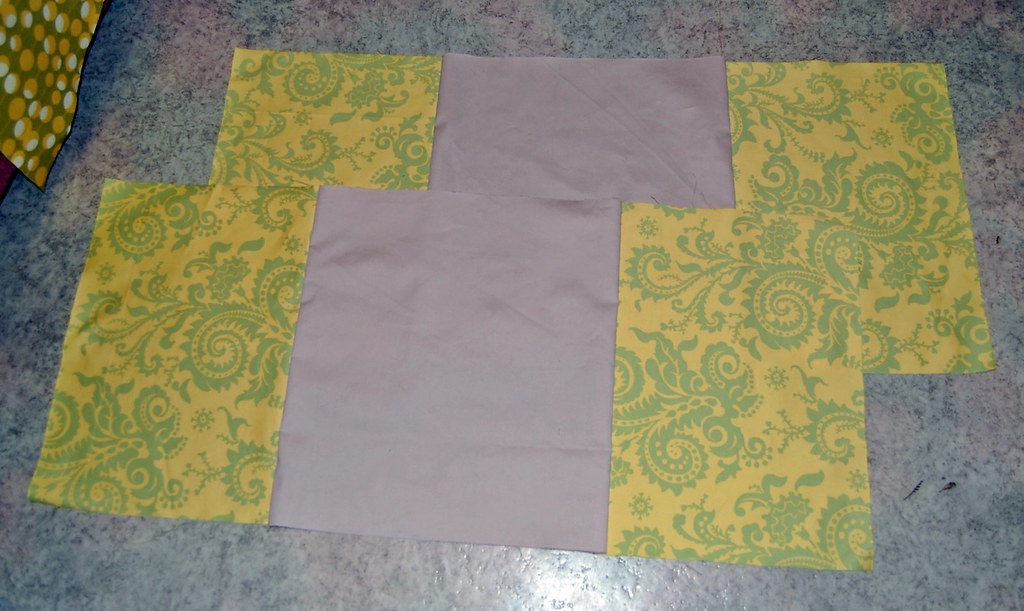
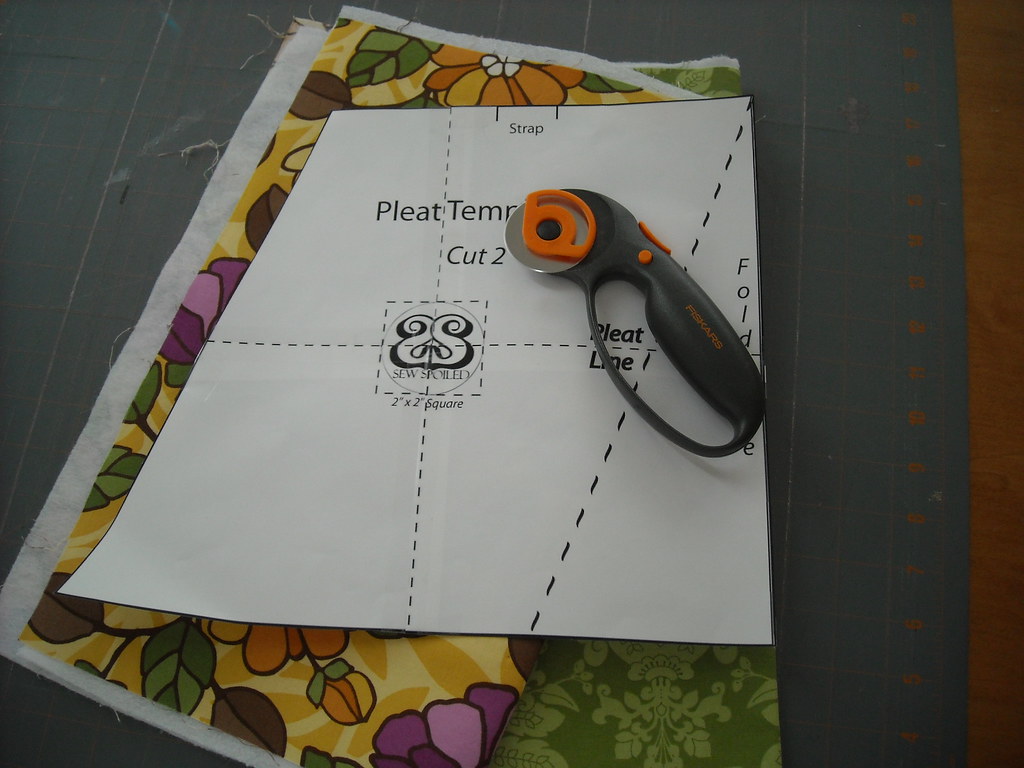
This is from My Little Hedgehog's photostream. 
Good idea to check the template with your fabrics before starting step 3.
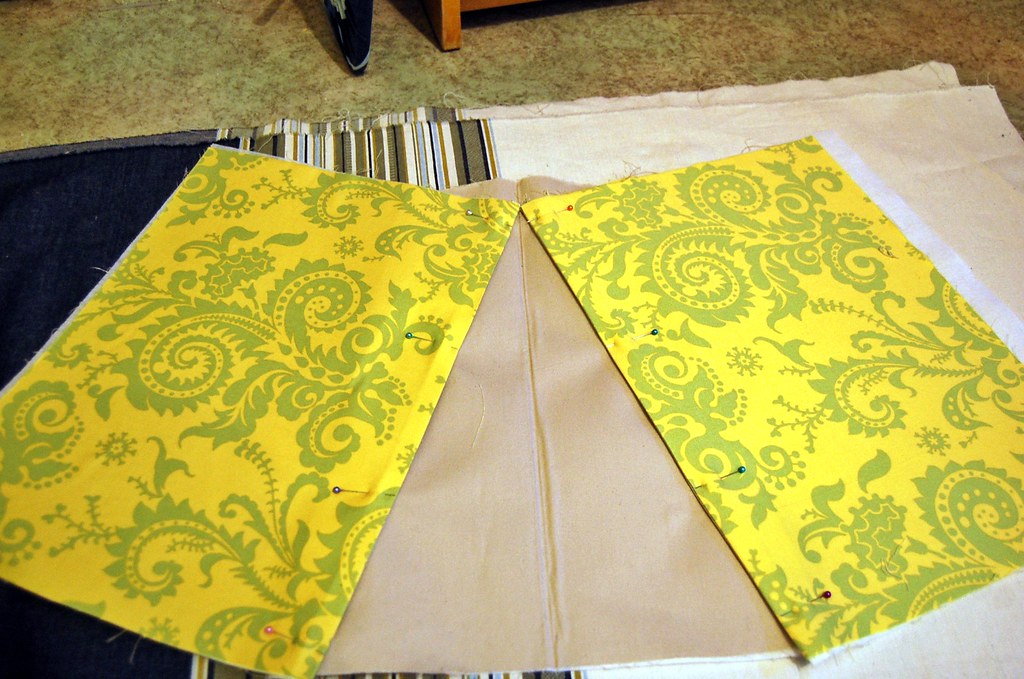
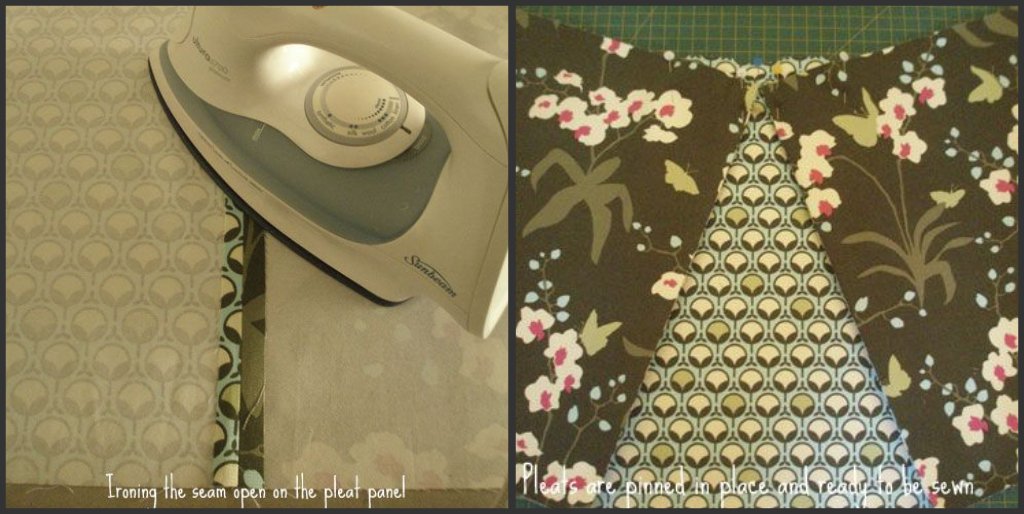
This is exactly how I sew my pleats. Lovely!

This is part of step 5 but if you are smart you have read ahead and you are getting ready!
Thank you My Little Hedgehog!

New Photostream!
The Accidental Crafter's pictures of step 2.

Step 3 from The Accidental Crafter. Make sure you check out her blog
I learned about a new cute dress pattern by Make It Perfect available soon!

But that is not all....
Square Bag completing Step 2. What a clear picture!

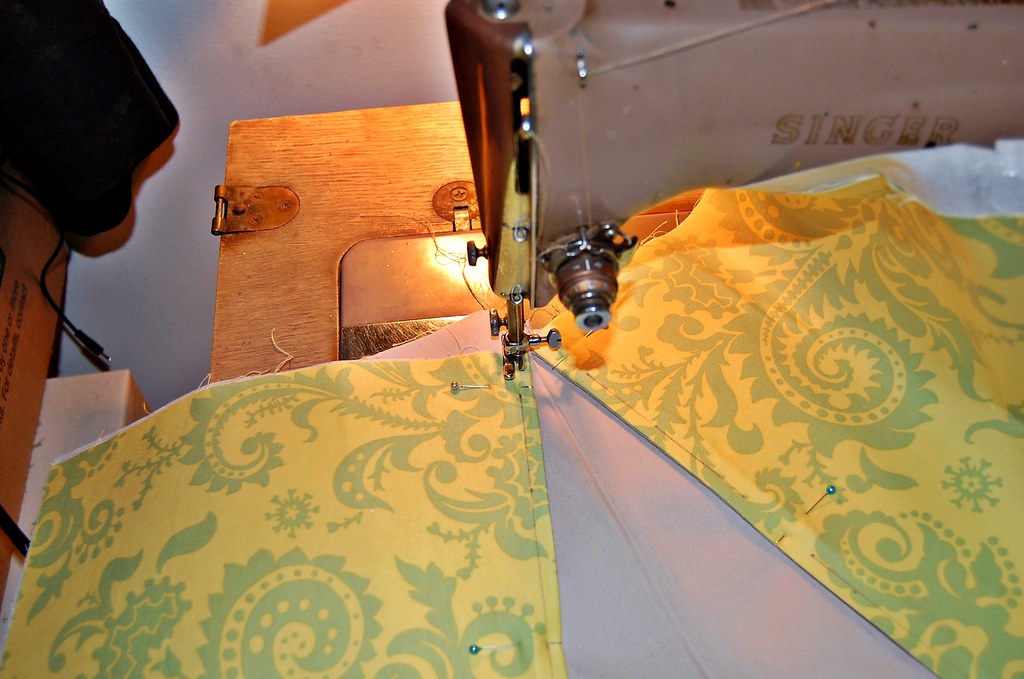
Pleat work from Square Bag, Step 3.

I love this! I might have to try this, topstitching the sides of the pleat.
Great pictures! I can see your love of sewing through your pictures! Thank you for sharing all of your photos, comments and questions.
Happy Sewing!
~Leah

Comments

The Sewist said…
Its so lovely to see how all the totes are coming along i need to get a move on mine..thanks for hosting this great sew a long!

Mayya @ Sew Chic and Unique
Becka said…
I am having some problems working on this pattern. I have made many totes, so I am not new to this, is there a video or any more photos?

Thank you!

Rebecca
Sew Spoiled said…
Email me at Leah.sewspoiled@gmail.com. Make sure you have the ePattern from the Tutorial page of this blog.
Thanks,
Leah

Popular posts from this blog

Fun in the Sun Mermaid Tutorial

Sewing Materials: 1/4 yard of Lycra or  5T or larger old swimsuit Thread Stretch Needle (helps) Sewing Machine and Sewing Notions Print the PDF patterns pieces out and tape them together. ✄✄✄✄✄✄✄✄✄✄✄ ✄✄✄✄ ✄✄ Step 1: Cutting Layout-  Place the templates over the fabric and cut. ✄✄✄✄✄✄✄✄✄✄✄ ✄✄✄✄ ✄✄ Step 2:   Fold the top edges of the mermaid tail and sew across. ✄✄✄✄✄✄✄✄✄✄✄ ✄✄✄✄ ✄✄ Step 3: Place the mermaid tale pieces right sides together. Sew around the mermaid tail using the stretch stitch, it looks like a bolt of lighting. ✄✄✄✄✄✄✄✄✄✄✄ ✄✄✄✄ ✄✄ Step 4: Flip the mermaid tail right side out using a chopstick.   Option: You can add Poly-fil to make the end of the tale puffy.   Set aside. ✄✄✄✄✄✄✄✄✄✄✄ ✄✄✄✄ ✄✄ Bodice   Step 1: Cut a bodice measuring  4.5” X1.5” or use template. ✄✄✄✄✄✄✄✄✄✄✄ ✄✄✄✄ ✄✄ Step 2: Fold the bodice right sides together and sew the  short ends making a loop. Use the edge of the presser foot for your seam a

How to Line an A-Line Skirt Tutorial

 After you find an A-line skirt pattern , I am using  One Yard Wonders 101  template . Make a muslin of your skirt! It only takes a few minutes to make a muslin version. Just baste stitch the side seams and make adjustments for your hips. Once your template is right you can make all the skirts your heart desires, so it is important to get the perfect fit first. Now we are ready to cut the "good" fabric and sew! ---------------------------------- ---------------------------------- ---------------------------------- ---------------------------------- Flip the skirt right side out and put it on!! You are done!! It is super easy and your new skirt will look store made.  Plus there is no hand stitching the lining to the main fabric. If you have any questions please comment below or email me at leah.sewspoiled@gmail.com .  WooHooo!! A-Line Skirt Pattern Finds

Sweet Coin Purse Tutorial for Teacher Gifts

This time of year is so special to me because I get to show my gratitude for all of the hard work that goes into teaching my daughters. I love to make handmade gifts and this year is no exception. Since money does not grow on trees around here, I looked at my stash (I keep my scraps in hat boxes ) and tried to see what I had a lot of; small zippers, trims, Peltex strips ( from making iPad cases ), fabric scraps and some hardware for key fobs. So I set to work.  Materials: Plastic multipurpose 5" Zipper  Fabric Scraps Lightweight interfacing 808 Pellon Trims (We clipped  key fobs  with 1.5" swivel hooks onto our coin purses . There are tons of tutorials on making key fobs .) Step 1: Print out the Coin Purse Template  PDF.  Cut 2 main fabric, cut 2 lining and 2 interfacing using the template.  Optional: Cut a 2"X2" square of your choice main fabric or lining. This strip of fabric is used to clip a key fob to your coin purse later. We used a 1.5