
Sew Spoiled: Sleep-In-Late Pillowcase Tutorial

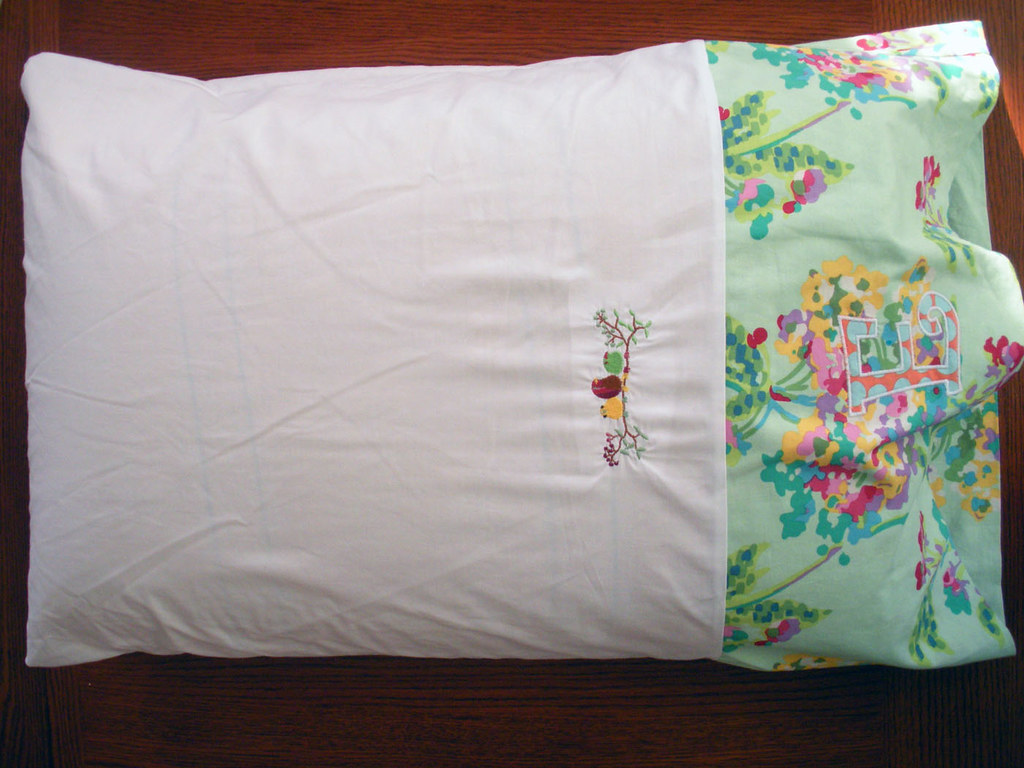
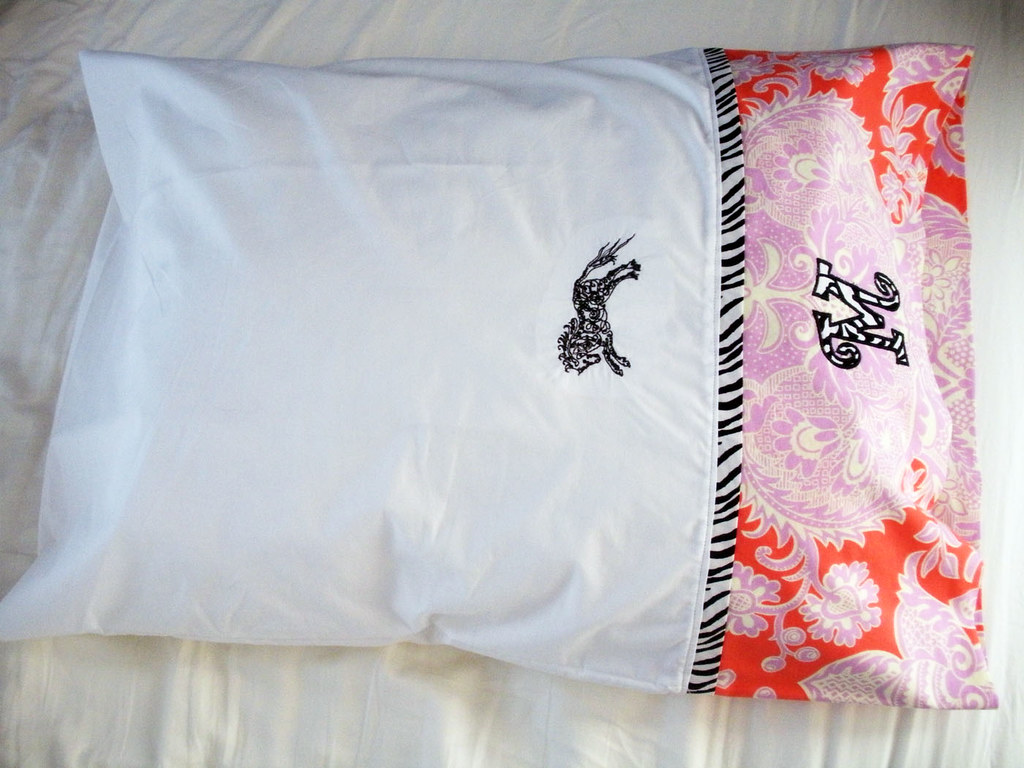
This pillowcase was super easy to make, so easy that I let my daughters create their own and choose cute  embroidery designs to make it personalized for them. We had movie night and they lounged all over them and fell asleep. This pillowcase however gets it's name because of the next morning. My sweet daughters slept in! They never sleep in, 6:30AM and they bounce into my room and poke me until I wake up but not this morning! :) I am proud to say they slept in to 8:30AM! 
So how do you make the Sleep-In-Late Pillowcase? 
Here is how!
Materials:
white cotton fabric- 44"wX22"h
Fab fabric- half a yard 18" X 44"


Step 1: Cut out these pieces. Embroider or applique them if you want to make them personalized.


Step 2: Sew the fab fabric right sides together along the 18" side. 

Step 3: Fold in half right side out, now it will measure 9"X 21", iron. (I am using zebra trim just for fun.)


Step 4: Fold the white fabric in half right sides together and sew 1/2" along the two folded edges. 

Step 5: Tuck the fab fabric inside the white fabric right sides together. 


Step 6: Pin the raw edges together and sew.


Step 7: Topstitch over the seam.
I did use my serger and if you have one sitting in your closet inside a box, get it out and try this!!! 
This is a great first project to get to know your serger!
 Enjoy your Sleep in Late Pillowcase!
Don't forget it is almost time for the June giveaway! 
~Leah

Comments

Those are so cute!! I am going to have to make some.
Anonymous said…
Just a quick note to let you know that a link to this post will be placed on CraftCrave today [26 Jun 02:00pm GMT]. Thanks, Maria
Ginger said…
We have the same sewing/embroidery machine. Could you tell me where you found the letters you used for monogramming? They are very cute.
Rachel said…
This looks amazing! I just got my first sewing machine delivered today and I'm eager to get started on a beginner-type project and you seem like an expert so is there anything you can suggest?

Popular posts from this blog

Fun in the Sun Mermaid Tutorial

Sewing Materials: 1/4 yard of Lycra or  5T or larger old swimsuit Thread Stretch Needle (helps) Sewing Machine and Sewing Notions Print the PDF patterns pieces out and tape them together. ✄✄✄✄✄✄✄✄✄✄✄ ✄✄✄✄ ✄✄ Step 1: Cutting Layout-  Place the templates over the fabric and cut. ✄✄✄✄✄✄✄✄✄✄✄ ✄✄✄✄ ✄✄ Step 2:   Fold the top edges of the mermaid tail and sew across. ✄✄✄✄✄✄✄✄✄✄✄ ✄✄✄✄ ✄✄ Step 3: Place the mermaid tale pieces right sides together. Sew around the mermaid tail using the stretch stitch, it looks like a bolt of lighting. ✄✄✄✄✄✄✄✄✄✄✄ ✄✄✄✄ ✄✄ Step 4: Flip the mermaid tail right side out using a chopstick.   Option: You can add Poly-fil to make the end of the tale puffy.   Set aside. ✄✄✄✄✄✄✄✄✄✄✄ ✄✄✄✄ ✄✄ Bodice   Step 1: Cut a bodice measuring  4.5” X1.5” or use template. ✄✄✄✄✄✄✄✄✄✄✄ ✄✄✄✄ ✄✄ Step 2: Fold the bodice right sides together and sew the  short ends making a loop. Use the edge of the presser foot for your seam a

How to Line an A-Line Skirt Tutorial

 After you find an A-line skirt pattern , I am using  One Yard Wonders 101  template . Make a muslin of your skirt! It only takes a few minutes to make a muslin version. Just baste stitch the side seams and make adjustments for your hips. Once your template is right you can make all the skirts your heart desires, so it is important to get the perfect fit first. Now we are ready to cut the "good" fabric and sew! ---------------------------------- ---------------------------------- ---------------------------------- ---------------------------------- Flip the skirt right side out and put it on!! You are done!! It is super easy and your new skirt will look store made.  Plus there is no hand stitching the lining to the main fabric. If you have any questions please comment below or email me at leah.sewspoiled@gmail.com .  WooHooo!! A-Line Skirt Pattern Finds

Sweet Coin Purse Tutorial for Teacher Gifts

This time of year is so special to me because I get to show my gratitude for all of the hard work that goes into teaching my daughters. I love to make handmade gifts and this year is no exception. Since money does not grow on trees around here, I looked at my stash (I keep my scraps in hat boxes ) and tried to see what I had a lot of; small zippers, trims, Peltex strips ( from making iPad cases ), fabric scraps and some hardware for key fobs. So I set to work.  Materials: Plastic multipurpose 5" Zipper  Fabric Scraps Lightweight interfacing 808 Pellon Trims (We clipped  key fobs  with 1.5" swivel hooks onto our coin purses . There are tons of tutorials on making key fobs .) Step 1: Print out the Coin Purse Template  PDF.  Cut 2 main fabric, cut 2 lining and 2 interfacing using the template.  Optional: Cut a 2"X2" square of your choice main fabric or lining. This strip of fabric is used to clip a key fob to your coin purse later. We used a 1.5