
Sew Over It Heather Dress #3

fullsizeoutput_19abfullsizeoutput_19b2
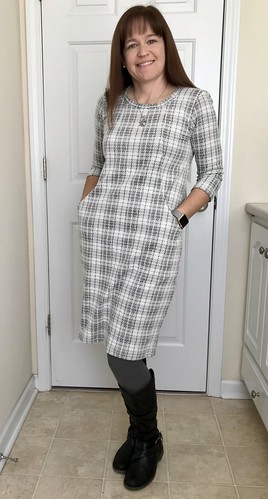
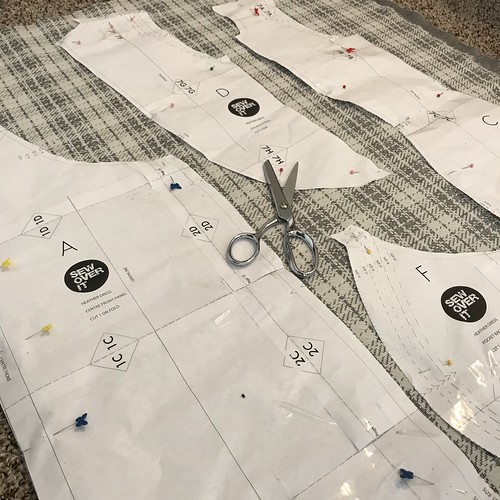
I made a plaid Heather Dress designed by the Sew Over It! Making anything out of plaid is extremely hard. You have to make sure you are lining up all of the horizontal and vertical lines with the grain lines on the paper pattern pieces. I used a ruler on top of my paper pattern pieces to make sure that everything lined up. It took longer to true up the fabric than it took to make the actual dress but it was well worth it! In the end, I had to decide that the horizontal lines mattered more. I placed also paid close attention to where the notches where on the separate pattern pieces so when I sewed them together it would also align. If you don't want to deal will plaid craziness and you still would like to have plaid on your dress, you can use plaid fabric for the center front and back pieces of the pattern.
Untitled
I am not sure I recommend others to sew this dress pattern totally in plaid. Many have used a plaid or other design for the center panel and that works very well. I am a crazy person, who loves a challenge and the feeling of frustration in my sewing space. This is a size 10, bust size 35. You really need to follow the 5/8" seam allowance as you are sewing the entire dress pattern. I wish there was a neckline band pattern piece, it states in the pattern to measure and then attach it. I guess the reason for having you measure your own neckline is because all of the seam allowances come together there (6 different seam allowance sewn) if you did not follow the 5/8" seam allowance then your neckband piece would be different in length. I will definitely buy more Sew Over It designs! I am looking at the  Ultimate Trousers sewing pattern. I love making my own clothes. I can create what I want in a garment. I don't have to wait for someone else to design it for me. I don't have to hunt for clothes online and/or look for it in the stores around me. Sewing gives me the freedom to make and wear what I love. What is on your sewing table?
Best Wishes and Tons of Stitches!

Comments

Anonymous said…
This is a beautiful dress with masterfully matched plaid!

Popular posts from this blog

Sweet Coin Purse Tutorial for Teacher Gifts

This time of year is so special to me because I get to show my gratitude for all of the hard work that goes into teaching my daughters. I love to make handmade gifts and this year is no exception. Since money does not grow on trees around here, I looked at my stash (I keep my scraps in hat boxes ) and tried to see what I had a lot of; small zippers, trims, Peltex strips ( from making iPad cases ), fabric scraps and some hardware for key fobs. So I set to work.  Materials: Plastic multipurpose 5" Zipper  Fabric Scraps Lightweight interfacing 808 Pellon Trims (We clipped  key fobs  with 1.5" swivel hooks onto our coin purses . There are tons of tutorials on making key fobs .) Step 1: Print out the Coin Purse Template  PDF.  Cut 2 main fabric, cut 2 lining and 2 interfacing using the template.  Optional: Cut a 2"X2" square of your choice main fabric or lining. This strip of fabric is used to clip a key fob to your coin purse later....

Fun in the Sun Mermaid Tutorial

Sewing Materials: 1/4 yard of Lycra or  5T or larger old swimsuit Thread Stretch Needle (helps) Sewing Machine and Sewing Notions Print the PDF patterns pieces out and tape them together. ✄✄✄✄✄✄✄✄✄✄✄ ✄✄✄✄ ✄✄ Step 1: Cutting Layout-  Place the templates over the fabric and cut. ✄✄✄✄✄✄✄✄✄✄✄ ✄✄✄✄ ✄✄ Step 2:   Fold the top edges of the mermaid tail and sew across. ✄✄✄✄✄✄✄✄✄✄✄ ✄✄✄✄ ✄✄ Step 3: Place the mermaid tale pieces right sides together. Sew around the mermaid tail using the stretch stitch, it looks like a bolt of lighting. ✄✄✄✄✄✄✄✄✄✄✄ ✄✄✄✄ ✄✄ Step 4: Flip the mermaid tail right side out using a chopstick.   Option: You can add Poly-fil to make the end of the tale puffy.   Set aside. ✄✄✄✄✄✄✄✄✄✄✄ ✄✄✄✄ ✄✄ Bodice   Step 1: Cut a bodice measuring  4.5” X1.5” or use template. ✄✄✄✄✄✄✄✄✄✄✄ ✄✄✄✄ ✄✄ Step 2: Fold the bodice right sides together and sew the  short ends making a loop. Use the e...

May 2011 Giveaway!

Thank you Sew Mama Sew for making today, May 23, 2011 Giveaway Day! Sew Love Fabrics will be sponsoring this month’s giveaway with eight fat quarters (18”X 22”) of Prince Charming prints in olive green, equaling 2 yards of gorgeous fabrics! If you would like to read more about Ruth, founder of Sew Love Fabrics , read her interview . Thank you so much for sharing your love of fabric with us! These are the fat quarters ready to ship to the lucky winner!! Giveaway Rules! +Our Giveaway will run May 23-27, 2011, with the winner being announced May 28, 2011! +The winner will be selected by Random.org +The package will be shipped to the winner by May 30, 2011. + To enter to win post a comment on this blog post! +Only one comment please per person. +This giveaway is open to everyone. +Leave your EMAIL ADDRESS, you can leave it as: leah(dot)sewspoiled(at)gamil(dot)com +This giveaway ends May 27, 2011 at 8PM Eastern Standard Time Thank you Ruth for sponsoring our May giveaway from Sew Love ...