
One of a Kind Guitar Strap!

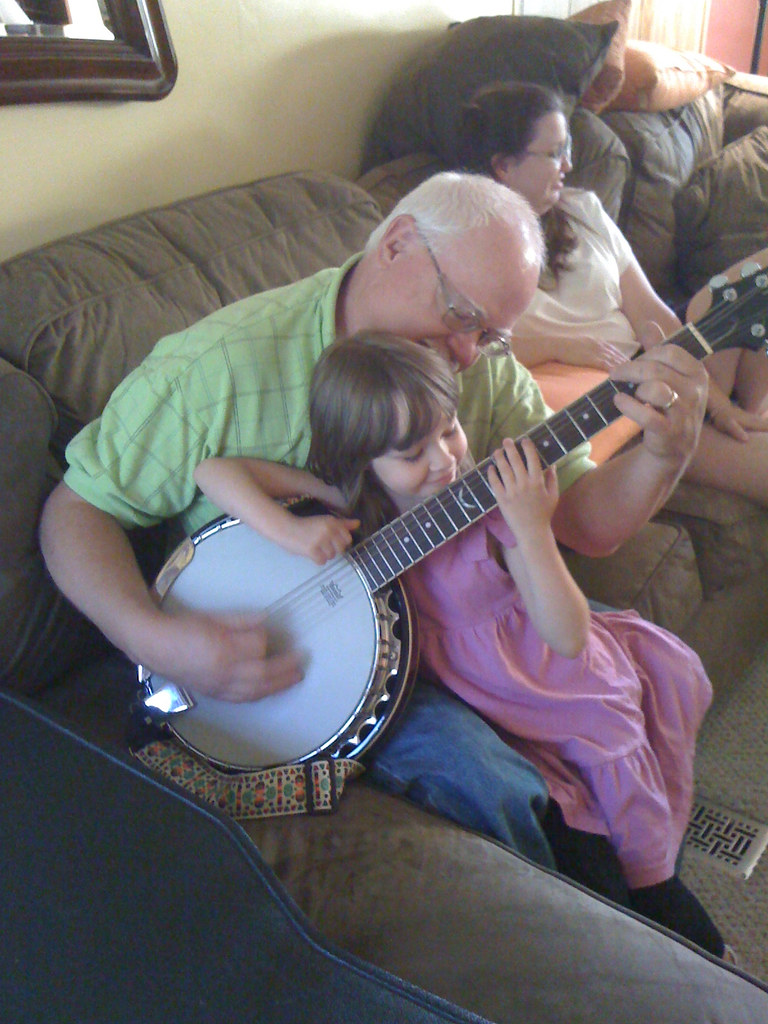
This is a picture of my oldest playing banjo with Grandpa! 
My Dad has played guitar since he was a young boy. His inner ear is amazing and without reading music he is able to play whatever he hears. I have always admired that! I have had formal music training since I was 10, read music note to note and went to school to become a music teacher however whenever we sit down together I always learn something new about music. I recently started to miss our jam sessions and that is when I decided to make something special for him. 
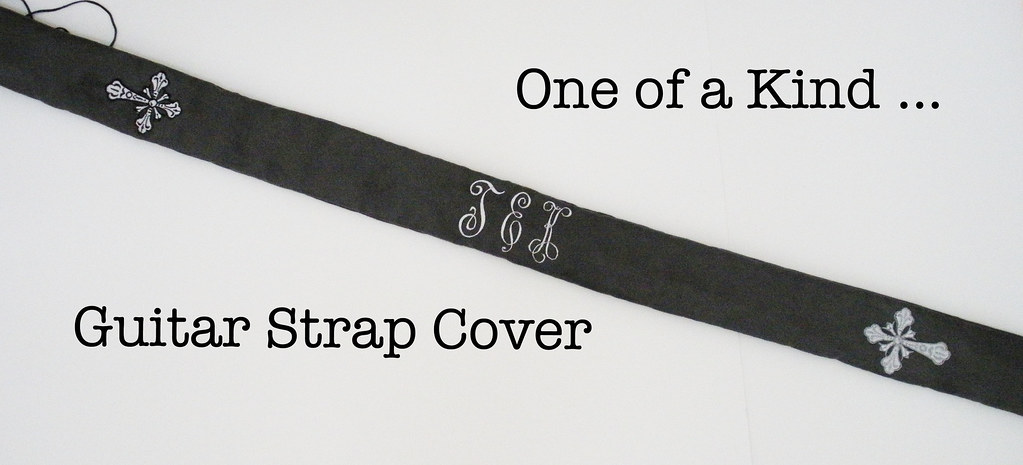
I remembered that his guitar strap was not comfortable anymore. I looked for a tutorial for a guitar strap cover tutorial, no reason to reinvent the wheel, and that is when I found the DIY guitar strap on Prudent Baby! It is very simple and a wonderful gift.  I embroidered his initials and the celtic crosses  on soft microfiber. I used fleece to pad the strap along his back.  
Making something special made me feel better about missing my Dad. And you know I bet it will make him feel better to know that I was thinking of our musical jam sessions. :) If you are missing someone special, make them a one of a kind gift and send it! Think about something you share together and make it like no one else can. Get the kids involved and make it a family celebration!
Happy Sewing!
~Leah

Comments

Michele said…
My dad has the ear for music too. I've always admired the true musicians who can hear something and play it. I unfortunately, need the sheet music. We are lucky girls to be able to "rock out" with our pops. And the future generations getting to experience it are just icing on the cake! Rock on!
Sew Spoiled said…
Rock On Michele! Thanks for stopping by! Your post put a smile on my face!
(All Smiles!)
~Leah

Popular posts from this blog

Fun in the Sun Mermaid Tutorial

Sewing Materials: 1/4 yard of Lycra or  5T or larger old swimsuit Thread Stretch Needle (helps) Sewing Machine and Sewing Notions Print the PDF patterns pieces out and tape them together. ✄✄✄✄✄✄✄✄✄✄✄ ✄✄✄✄ ✄✄ Step 1: Cutting Layout-  Place the templates over the fabric and cut. ✄✄✄✄✄✄✄✄✄✄✄ ✄✄✄✄ ✄✄ Step 2:   Fold the top edges of the mermaid tail and sew across. ✄✄✄✄✄✄✄✄✄✄✄ ✄✄✄✄ ✄✄ Step 3: Place the mermaid tale pieces right sides together. Sew around the mermaid tail using the stretch stitch, it looks like a bolt of lighting. ✄✄✄✄✄✄✄✄✄✄✄ ✄✄✄✄ ✄✄ Step 4: Flip the mermaid tail right side out using a chopstick.   Option: You can add Poly-fil to make the end of the tale puffy.   Set aside. ✄✄✄✄✄✄✄✄✄✄✄ ✄✄✄✄ ✄✄ Bodice   Step 1: Cut a bodice measuring  4.5” X1.5” or use template. ✄✄✄✄✄✄✄✄✄✄✄ ✄✄✄✄ ✄✄ Step 2: Fold the bodice right sides together and sew the  short ends making a loop. Use the edge of the presser foot for your seam a

How to Line an A-Line Skirt Tutorial

 After you find an A-line skirt pattern , I am using  One Yard Wonders 101  template . Make a muslin of your skirt! It only takes a few minutes to make a muslin version. Just baste stitch the side seams and make adjustments for your hips. Once your template is right you can make all the skirts your heart desires, so it is important to get the perfect fit first. Now we are ready to cut the "good" fabric and sew! ---------------------------------- ---------------------------------- ---------------------------------- ---------------------------------- Flip the skirt right side out and put it on!! You are done!! It is super easy and your new skirt will look store made.  Plus there is no hand stitching the lining to the main fabric. If you have any questions please comment below or email me at leah.sewspoiled@gmail.com .  WooHooo!! A-Line Skirt Pattern Finds

Sweet Coin Purse Tutorial for Teacher Gifts

This time of year is so special to me because I get to show my gratitude for all of the hard work that goes into teaching my daughters. I love to make handmade gifts and this year is no exception. Since money does not grow on trees around here, I looked at my stash (I keep my scraps in hat boxes ) and tried to see what I had a lot of; small zippers, trims, Peltex strips ( from making iPad cases ), fabric scraps and some hardware for key fobs. So I set to work.  Materials: Plastic multipurpose 5" Zipper  Fabric Scraps Lightweight interfacing 808 Pellon Trims (We clipped  key fobs  with 1.5" swivel hooks onto our coin purses . There are tons of tutorials on making key fobs .) Step 1: Print out the Coin Purse Template  PDF.  Cut 2 main fabric, cut 2 lining and 2 interfacing using the template.  Optional: Cut a 2"X2" square of your choice main fabric or lining. This strip of fabric is used to clip a key fob to your coin purse later. We used a 1.5