
Spring Wrap Dresses!

These dresses were made for my sister. She chose the fabrics and I put them together. She needed something that was adjustable and easy to wear after having surgery.
 This was the first time I used the twin needle function on my new sewing machine. I love how easy it is to use. I will be using the twin needle more often, now that I know exactly how to set it up.
Here is the finished sleeveless wrap dress in hot pink. She has these hot pink sandals that look amazing with this dress.
 More twin needle fun! It amazes me that the thread doesn't get tangled. 
 Here is the green print fabric wrap dress.
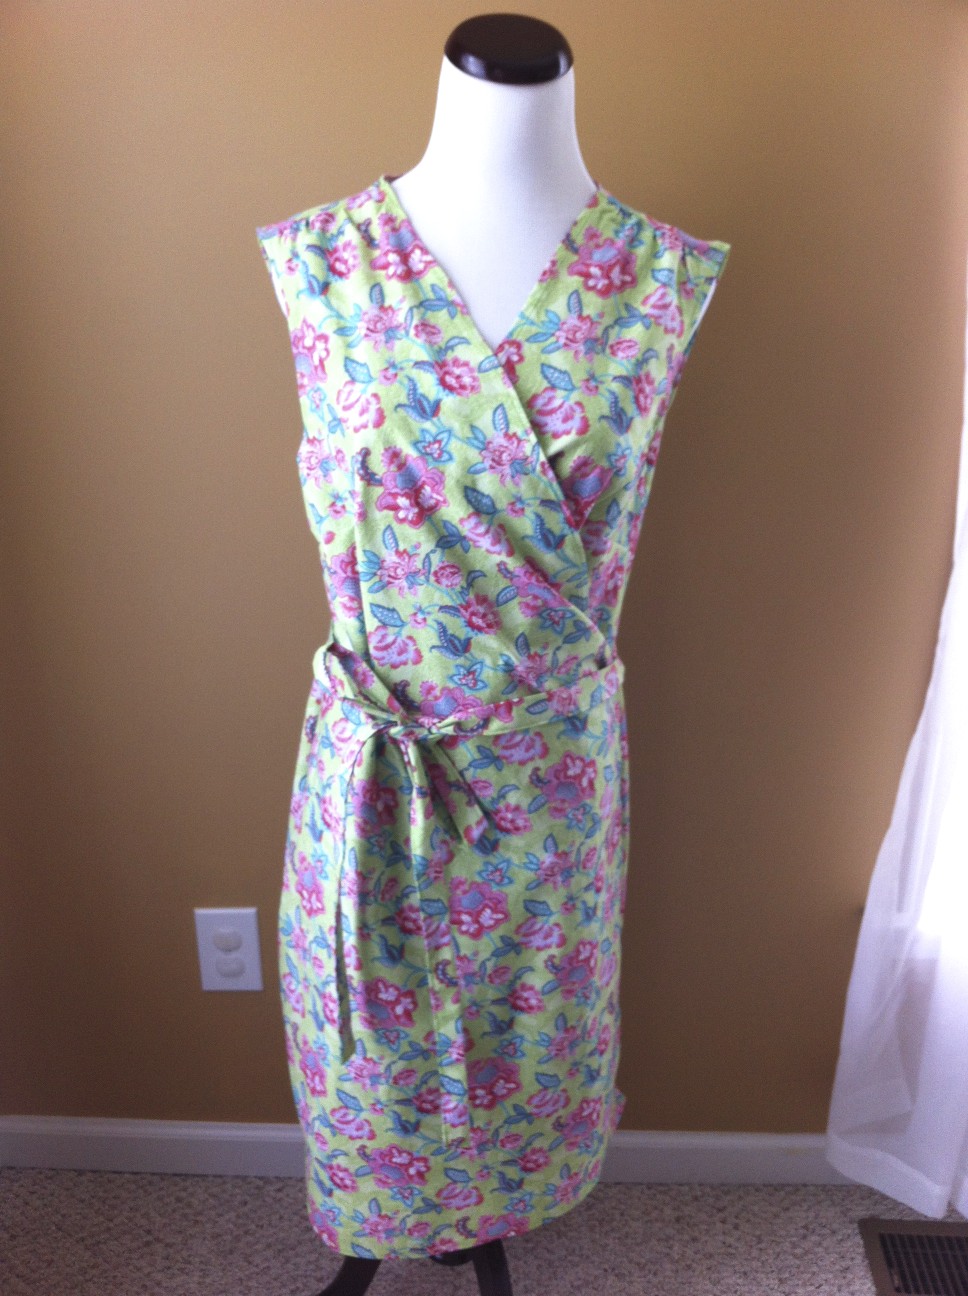
 Here is a better shot of the print on the green fabric.
I think I am going to make a few for me. The only adjustments I would make are the ties could be thicker and add pockets. This pattern was from the Sew It All Magazine pattern, Spring Wrap Dress.
Happy Sewing!

Comments

Corrine saidā€¦
What a charming little dress. This reminds me of one I made several years ago, however, it had an a-line flair in the skirt that made it very comfortable. If you play with the tensions on your machine, with the twin needle, you can pin tuck lightweight fabrics too. Have fun, thanks for sharing.
jan saidā€¦
your machine looks like mine...have never used the twin needle...guess i need to check the manual and learn how! love the dresses...super cute..
Ginger saidā€¦
Love the dresses! I need to look for this magazine next time I'm at a fabric store.
Ginger saidā€¦
Is this the Sew It All pattern? Did you skip the bound edges, I can't tell from the pictures?
Sew Spoiled saidā€¦
Hey Ginger,
It is the Sew It All Pattern and I did skip the binding. I sergered it instead. Then I topstitched with my twin needle.

Popular posts from this blog

Sweet Coin Purse Tutorial for Teacher Gifts

This time of year is so special to me because I get to show my gratitude for all of the hard work that goes into teaching my daughters. I love to make handmade gifts and this year is no exception. Since money does not grow on trees around here, I looked at my stash (I keep my scraps in hat boxes ) and tried to see what I had a lot of; small zippers, trims, Peltex strips ( from making iPad cases ), fabric scraps and some hardware for key fobs. So I set to work.  Materials: Plastic multipurpose 5" Zipper  Fabric Scraps Lightweight interfacing 808 Pellon Trims (We clipped  key fobs  with 1.5" swivel hooks onto our coin purses . There are tons of tutorials on making key fobs .) Step 1: Print out the Coin Purse Template  PDF.  Cut 2 main fabric, cut 2 lining and 2 interfacing using the template.  Optional: Cut a 2"X2" square of your choice main fabric or lining. This strip of fabric is used to clip a key fob to your coin purse later....

Fun in the Sun Mermaid Tutorial

Sewing Materials: 1/4 yard of Lycra or  5T or larger old swimsuit Thread Stretch Needle (helps) Sewing Machine and Sewing Notions Print the PDF patterns pieces out and tape them together. āœ„āœ„āœ„āœ„āœ„āœ„āœ„āœ„āœ„āœ„āœ„ āœ„āœ„āœ„āœ„ āœ„āœ„ Step 1: Cutting Layout-  Place the templates over the fabric and cut. āœ„āœ„āœ„āœ„āœ„āœ„āœ„āœ„āœ„āœ„āœ„ āœ„āœ„āœ„āœ„ āœ„āœ„ Step 2:   Fold the top edges of the mermaid tail and sew across. āœ„āœ„āœ„āœ„āœ„āœ„āœ„āœ„āœ„āœ„āœ„ āœ„āœ„āœ„āœ„ āœ„āœ„ Step 3: Place the mermaid tale pieces right sides together. Sew around the mermaid tail using the stretch stitch, it looks like a bolt of lighting. āœ„āœ„āœ„āœ„āœ„āœ„āœ„āœ„āœ„āœ„āœ„ āœ„āœ„āœ„āœ„ āœ„āœ„ Step 4: Flip the mermaid tail right side out using a chopstick.   Option: You can add Poly-fil to make the end of the tale puffy.   Set aside. āœ„āœ„āœ„āœ„āœ„āœ„āœ„āœ„āœ„āœ„āœ„ āœ„āœ„āœ„āœ„ āœ„āœ„ Bodice   Step 1: Cut a bodice measuring  4.5ā€ X1.5ā€ or use template. āœ„āœ„āœ„āœ„āœ„āœ„āœ„āœ„āœ„āœ„āœ„ āœ„āœ„āœ„āœ„ āœ„āœ„ Step 2: Fold the bodice right sides together and sew the  short ends making a loop. Use the e...

Cute as a Button Bookmark Tutorial

These are called Cute as a Button Bookmakers. They are cheap, easy to make and are wonderful gifts!  All you need is  Bookmarkers/ PaperClips Size 45 or 1 1/8" Button Covers and kit Glue Gun Pliers (which you won't need if you get the flat back buttons). Step 1: Make a few fabric covered buttons.  These are size 45 or 1 1/8" buttons. Step 2: If you use normal buttons you will need to take the loops off to make them flat. However you can buy flat back buttons and not have to worry about the loop. Step 3: Add a dab of hot glue to the top of the large paperclip pad and place your fabric button on top of the glue. Step 4: Let it cool and it's ready to use! Happy Crafting!