
SwimSuit Project and Tutorial Finds

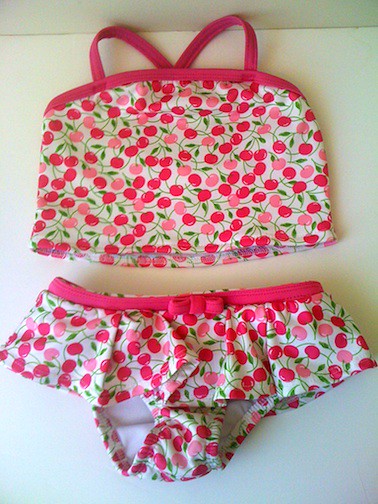
Last week my daughter had "Fun in the Sun" Day with her class. The only problem was, I hadn't found her a swimsuit that fit yet and the one from last season was too small length wise. She also told me, she would have to wear it all day! Her one piece had criss cross straps in the back and she would have to undress every time she had to go to the bathroom. (Mommies think like this.) So I decided to cut the one piece in half! This project was a little scary for me, since I am use to using cotton, not lycra. 
There are two rules to remember when sewing lycra.
Rule #1 You can not iron it. 
Rule #2 It works best if you serge or zigzag stitch the raw edges, before folding it over to finish an edge. 
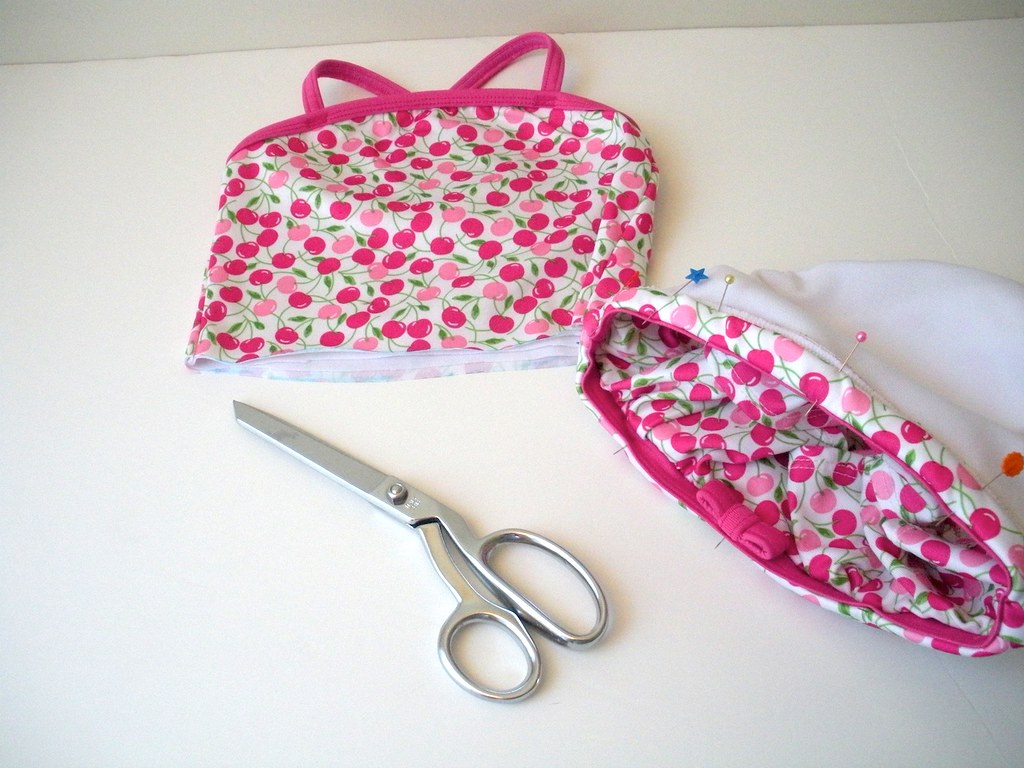
After cutting the one piece swimsuit in half. I looked at and said, "What have I done!" Then realizing there is no turning back now, I went for it! It had to work! I am showing you a picture of what I did next with the bottom piece. I rolled it over like you would cotton. Not the best idea! It was bulky and hard to sew over the side seams. Now, I know to serge or zigzag stitch first then turn once, not twice. :) After threading the elastic through the casing and finishing the bottoms. I turned my attention to the top.
    
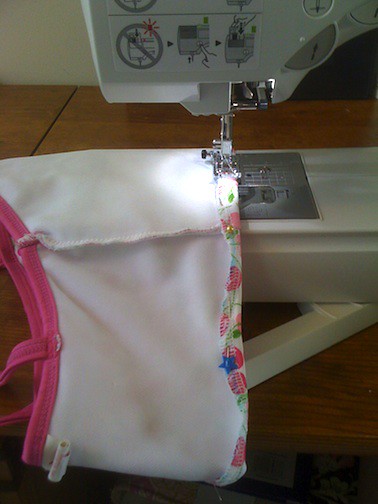
I serged the bottom first and then flipped the stitch over to topstitch it down. This was a small swimsuit so I knew the top would not roll up. However if you try this and the suite is not snug across the bottom then use elastic again along the seam.
Here are some tutorials on sewing swim suites and "Fun in the Sun" stuff! 
Happy Sewing!
~Leah

Comments

Daisy saidā€¦
I have the same problems with my daughter's swimsuits, but never thought to do this! Perfect way to salvage a still good suit!
Kathryn saidā€¦
So cute! What a great way to make use of a one piece, thanks for posting the tutorials!
Solidia saidā€¦
What a great idea! Thanks for sharing the tutorial.

Popular posts from this blog

Sweet Coin Purse Tutorial for Teacher Gifts

This time of year is so special to me because I get to show my gratitude for all of the hard work that goes into teaching my daughters. I love to make handmade gifts and this year is no exception. Since money does not grow on trees around here, I looked at my stash (I keep my scraps in hat boxes ) and tried to see what I had a lot of; small zippers, trims, Peltex strips ( from making iPad cases ), fabric scraps and some hardware for key fobs. So I set to work.  Materials: Plastic multipurpose 5" Zipper  Fabric Scraps Lightweight interfacing 808 Pellon Trims (We clipped  key fobs  with 1.5" swivel hooks onto our coin purses . There are tons of tutorials on making key fobs .) Step 1: Print out the Coin Purse Template  PDF.  Cut 2 main fabric, cut 2 lining and 2 interfacing using the template.  Optional: Cut a 2"X2" square of your choice main fabric or lining. This strip of fabric is used to clip a key fob to your coin purse later....

Fun in the Sun Mermaid Tutorial

Sewing Materials: 1/4 yard of Lycra or  5T or larger old swimsuit Thread Stretch Needle (helps) Sewing Machine and Sewing Notions Print the PDF patterns pieces out and tape them together. āœ„āœ„āœ„āœ„āœ„āœ„āœ„āœ„āœ„āœ„āœ„ āœ„āœ„āœ„āœ„ āœ„āœ„ Step 1: Cutting Layout-  Place the templates over the fabric and cut. āœ„āœ„āœ„āœ„āœ„āœ„āœ„āœ„āœ„āœ„āœ„ āœ„āœ„āœ„āœ„ āœ„āœ„ Step 2:   Fold the top edges of the mermaid tail and sew across. āœ„āœ„āœ„āœ„āœ„āœ„āœ„āœ„āœ„āœ„āœ„ āœ„āœ„āœ„āœ„ āœ„āœ„ Step 3: Place the mermaid tale pieces right sides together. Sew around the mermaid tail using the stretch stitch, it looks like a bolt of lighting. āœ„āœ„āœ„āœ„āœ„āœ„āœ„āœ„āœ„āœ„āœ„ āœ„āœ„āœ„āœ„ āœ„āœ„ Step 4: Flip the mermaid tail right side out using a chopstick.   Option: You can add Poly-fil to make the end of the tale puffy.   Set aside. āœ„āœ„āœ„āœ„āœ„āœ„āœ„āœ„āœ„āœ„āœ„ āœ„āœ„āœ„āœ„ āœ„āœ„ Bodice   Step 1: Cut a bodice measuring  4.5ā€ X1.5ā€ or use template. āœ„āœ„āœ„āœ„āœ„āœ„āœ„āœ„āœ„āœ„āœ„ āœ„āœ„āœ„āœ„ āœ„āœ„ Step 2: Fold the bodice right sides together and sew the  short ends making a loop. Use the e...

Cute as a Button Bookmark Tutorial

These are called Cute as a Button Bookmakers. They are cheap, easy to make and are wonderful gifts!  All you need is  Bookmarkers/ PaperClips Size 45 or 1 1/8" Button Covers and kit Glue Gun Pliers (which you won't need if you get the flat back buttons). Step 1: Make a few fabric covered buttons.  These are size 45 or 1 1/8" buttons. Step 2: If you use normal buttons you will need to take the loops off to make them flat. However you can buy flat back buttons and not have to worry about the loop. Step 3: Add a dab of hot glue to the top of the large paperclip pad and place your fabric button on top of the glue. Step 4: Let it cool and it's ready to use! Happy Crafting!